Summarise this article using AI


What’s stopping you from turning a lead into your customer?
In most cases, it’s the generic homepage you send to everyone. The one-size-fits-all type of homepage doesn’t work anymore.
You might spend hours crafting the perfect cold email. You research the company, its industry, and its challenges.
But all of that effort falls apart when the prospect clicks your link and lands on a generic page that speaks to no one in particular.
Companies don’t just want a solution; they want a solution catering to their business. A solution that addresses their needs, that considers their industries.
For years, marketers have tried to solve this by creating custom landing pages for each prospect.
The problem is the cost.
Hiring designers and developers, managing multiple pages, and maintaining them over time is not practical for individuals or small teams.
But that limitation is now gone.
With the integration of Clay and Webflow, you can generate a dynamic B2B landing page built specifically for each prospect.
Imagine this: you send your cold email to Stripe, they click on the homepage link, and they land on the page that caters to their needs.
A similar email is sent to Uber, targeting their industry.
This isn’t magic, but dynamic landing pages. And today, you can build this entire engine with just two tools: Clay and Webflow.
This guide will walk you through how you can build dynamic B2B landing pages with Clay.
We will go through the architecture, integration, and technical execution to get you started.
What is a Dynamic Landing Page?
A dynamic landing page is a single template URL.
For instance, yourdomain.com/companyname is the URL.
This landing page is personalized for each visitor visiting it. This page will have variable content like headlines, images, testimonials, logo.
These pages pull information from databases and determine what to show to the visitor. For instance:
If a prospect from Airbnb visits the link, the page might say:
"Help Airbnb streamline guest communication with AI."
If a prospect from Slack visits, the same URL structure changes to:
"Help Slack reduce enterprise churn with AI."
The Architecture for the Dynamic Engine
For generating dynamic pages, we need an engine.
We are not building pages one-by-one.
So we need a template for the page that pulls the information from the database and builds thousands of pages based on it.
This is what our dynamic engine will do.
For this, we need three things: the engine's brain, body, and nervous system.
- The Brain: The engine's brain will be Clay. It fetches the prospect or company's data. Clay can find people, companies, jobs, and local businesses.
You can import data from CRM or CMS. Clay will find and enrich the data. Once that is done, AI will write a custom copy for each page.
- The Body: The body of the engine is basically a CMS, and for this, we will be using Webflow.
Using Webflow, we will design one page that will be the main template. Webflow will use data from Clay for each prospect and create a landing page that meets each one's needs.
- The Nervous System: The final part of the engine that we are building is the nervous system.
This is integration between Clay and Webflow.
This nervous system will look for any new data in the brain, i.e., Clay, and for each new data point, it will create a new web page using Webflow.
Strategy for Building Dynamic Landing Pages
We will be building our landing pages using the dynamic engine. Our go-to approach will be to distinguish between static and dynamic elements within the page.
Usually, 80% of the webpage will be static, while the other 20% dynamic (changing the content as per the prospect).
Maintaining this ratio will ensure relevance and customer trust. This ensures the product targets the business’s needs without feeling like a scam.
Static Elements of the Web Page
Static elements will remain consistent across all pages. This makes your brand consistent and professional.
Static page elements usually include brand details and layouts.
- Navigation Bar: The navigation bar for navigation through menus will remain the same for all the pages we build using the engine.
- Core Product Features: The value proposition of your brand that makes your product original isn’t to be changed in any of the changes. The feature description will remain the same, but it should not over-promise the functionality that you aren’t offering.
- Pricing: The pricing of the pages will also remain static. As a brand owner, you cannot keep fluctuating the pricing for the prospects.
- Footer: The next thing that stays static is the footer, which holds the information like copyright, terms and conditions, privacy policy, etc. These should be consistent across all landing pages.
Dynamic Elements of the Web Page
Dynamic elements of the web pages will keep changing in every aspect.
These elements need to be strategically chosen, keeping in mind the requirements of the prospect you're emailing.
- Headlines and Sub-Headlines: Headlines and sub-headlines are the most important part of the prospect. They are tailored for the industry, addressing a specific pain point.
- Logo and Hero Image: A common thing in a landing page is a logo of both your brand and their brand with a plus sign between them.
Your logo will remain the same, but the other brand’s logo will change with every proposal you send.
Also, the hero image plays a crucial role in the prospect.
For instance, for a coffee brand, it can be an image of the barista, whereas for a tech company, it can be an image of computers. This will keep changing for every proposal you send.
- Social Proof: This includes case studies and testimonials for the specific industry. A case study of a law firm won’t matter to a tech company, and this will be a deal breaker for them.
Instead, for a law firm, your landing page should include a case study of a law firm.
- ROI Calculator: If you plan on including the ROI calculator in the landing page, then this might vary for each prospect that you plan on reaching out to.
Apart from this, other sections that can be dynamic are tech stack, Q&A section, CTAs, comparisons, reviews, etc.
Build Dynamic B2B Landing Pages with Clay: Step-by-Step Guide
First, we will start with setting up a destination for your data, i.e., your body. This includes creating a template for the landing page.
After this, we will import data into Clay.
As the last step, we will integrate Clay and Webflow. Here’s the detailed step-by-step guide on how to do so.
Prerequisites
There are two prerequisites to continue with the guide:
- You need a Clay account to start.
- You also need a Webflow account to create the template
Considering you already have these two accounts, we can continue with the guide ahead.
Step 1: Create CMS Collection in Webflow
First, we need to create a CMS collection in Webflow. Here’s how you can do it:
- Go to Webflow on your browser.
- Now, click the New Site button.

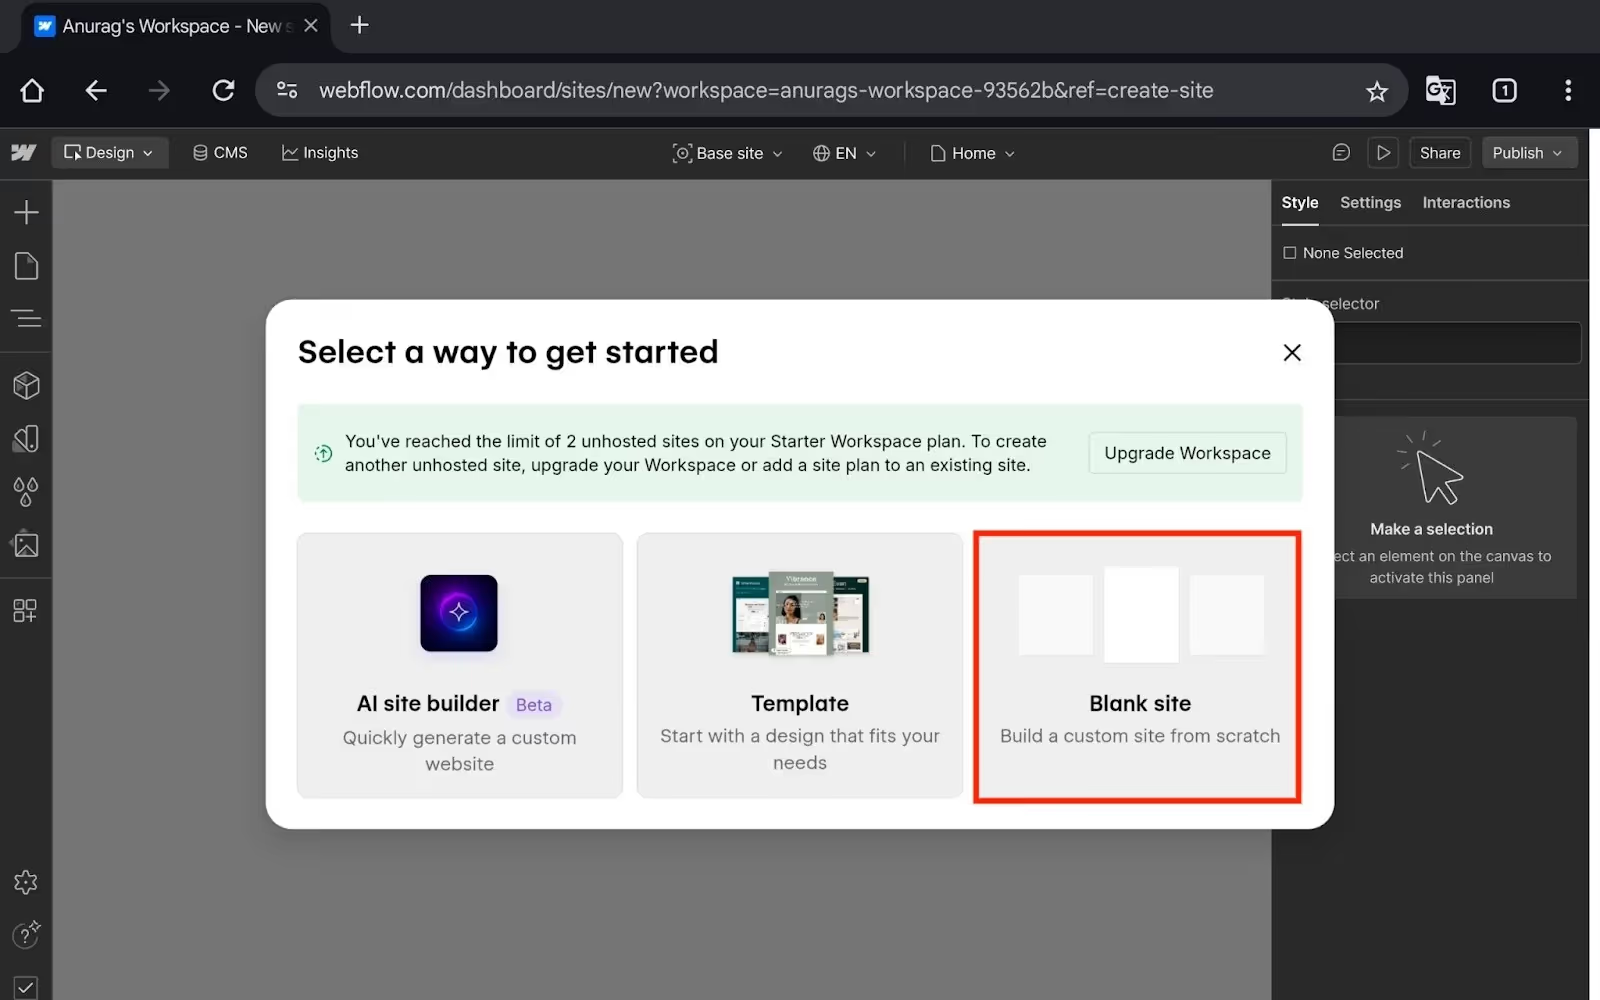
- After this, you will get three options:
- AI Site Builder- You can use Webflow’s AI to generate a site with your text prompt.
- Template- You will see a collection of templates (both free and paid), which you can use for your site.
- Blank Site- You will have to build a custom site from scratch.
- For now, let’s choose a blank site.
- Enter your site name (for example, B2B Landing Page), and click on Create Site.
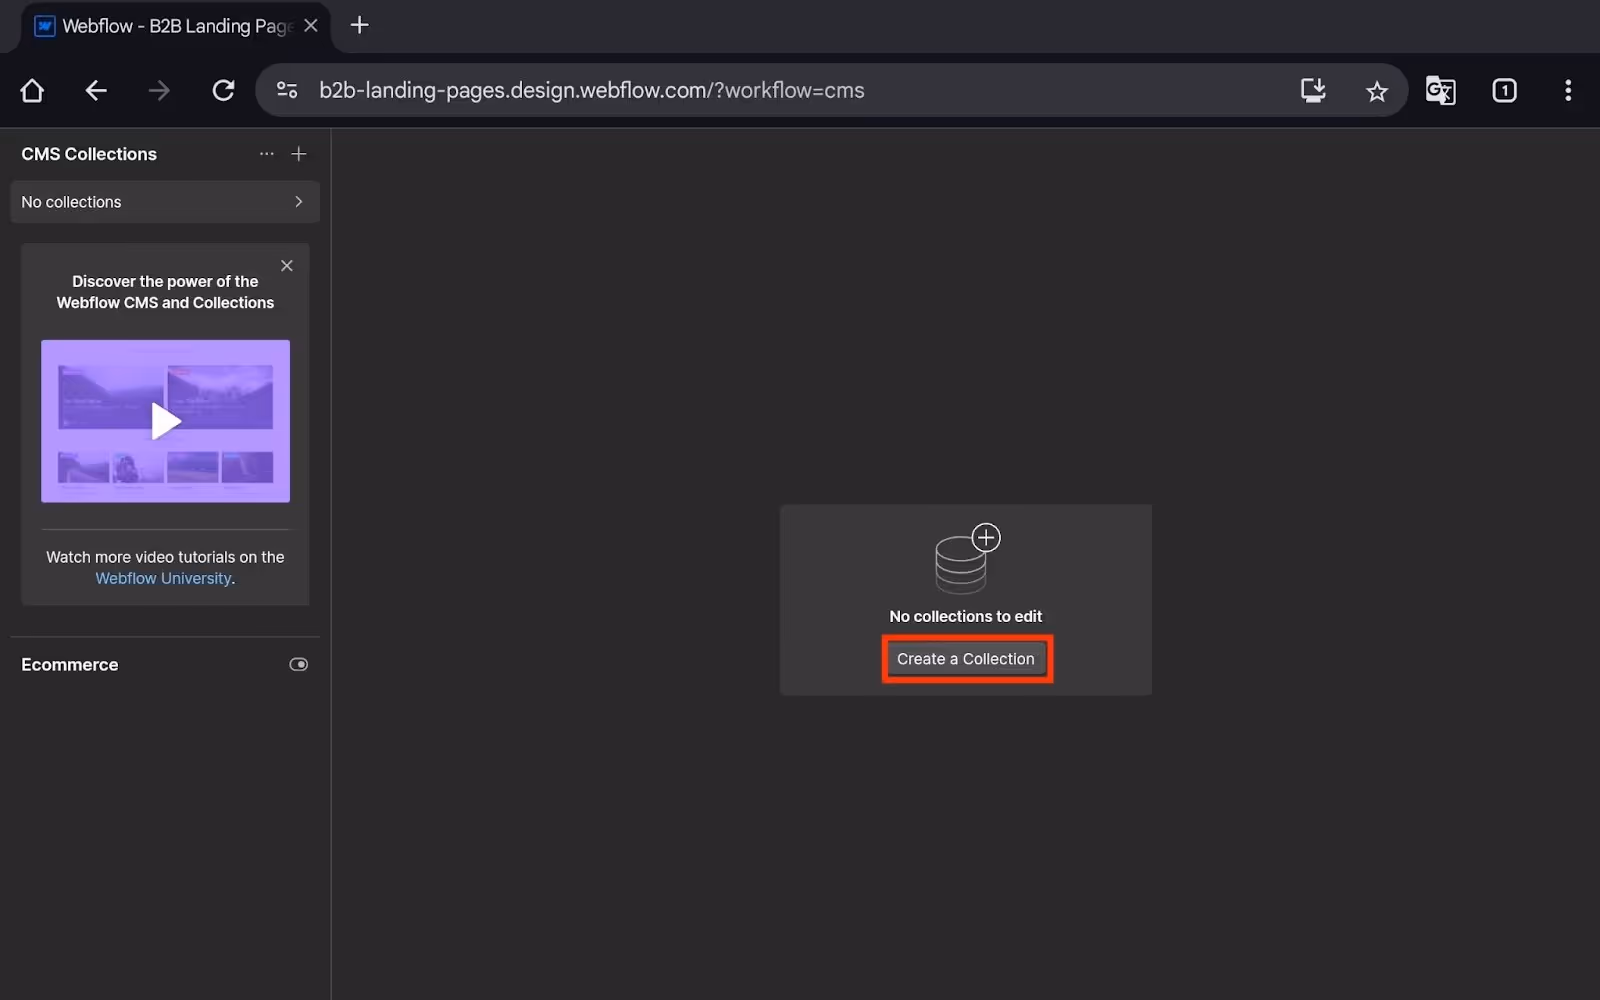
- Now, click the CMS tab.

- Click on Create a Collection.
- Enter the Collection Name (like Landing Pages).
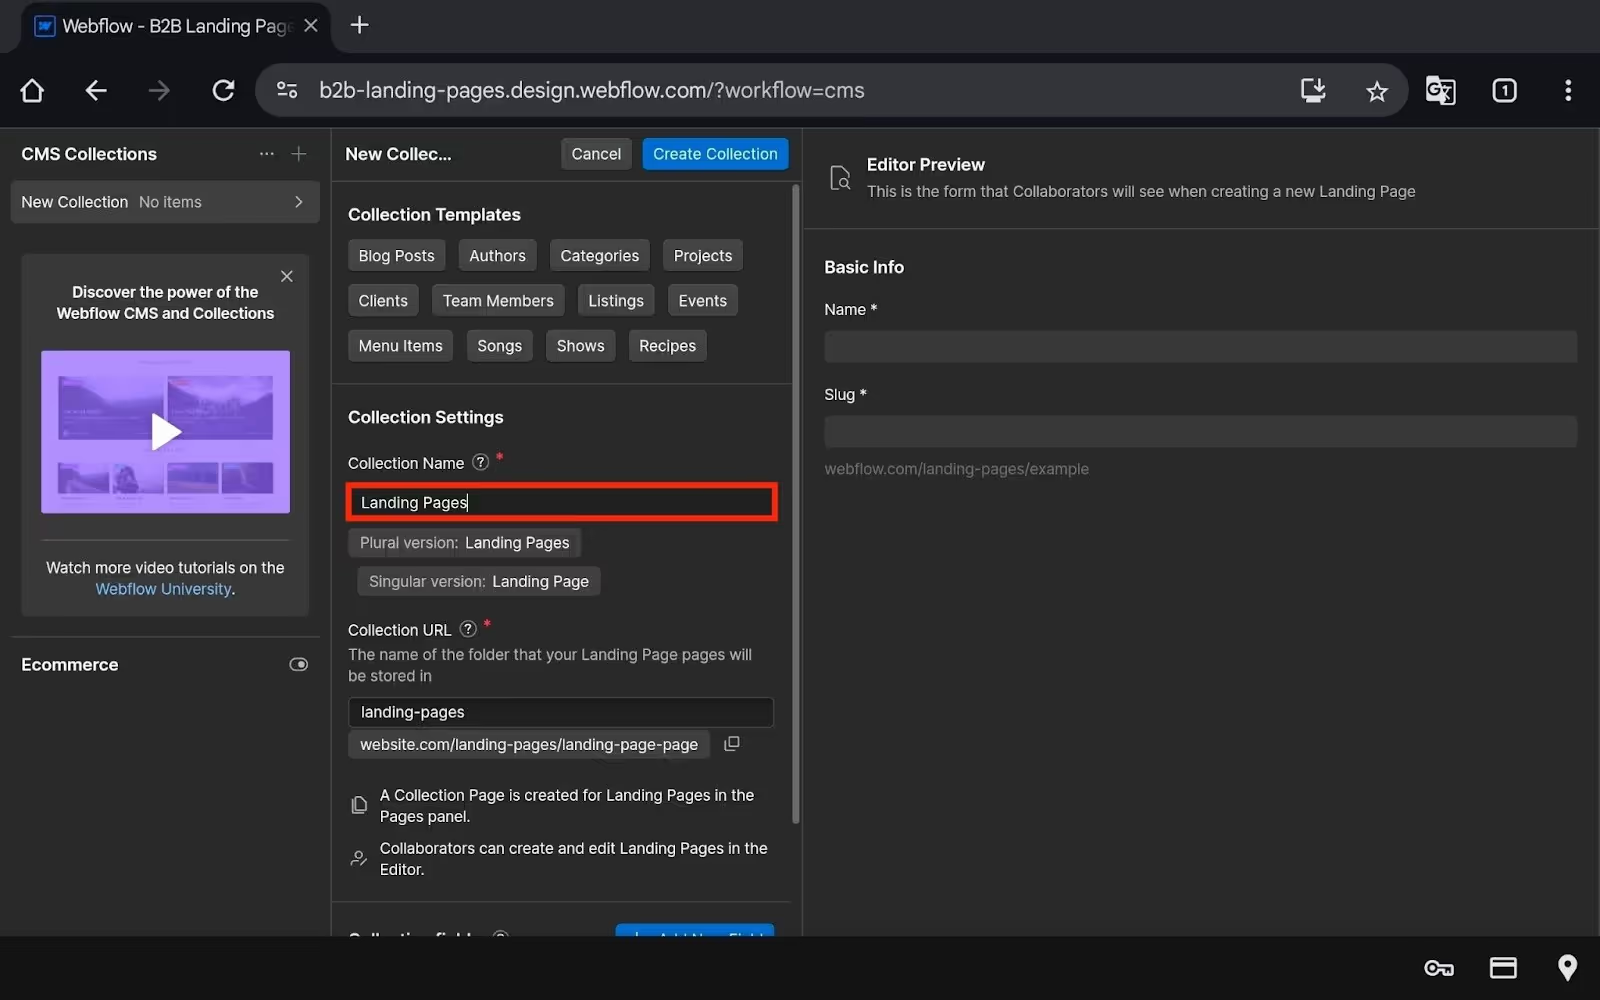
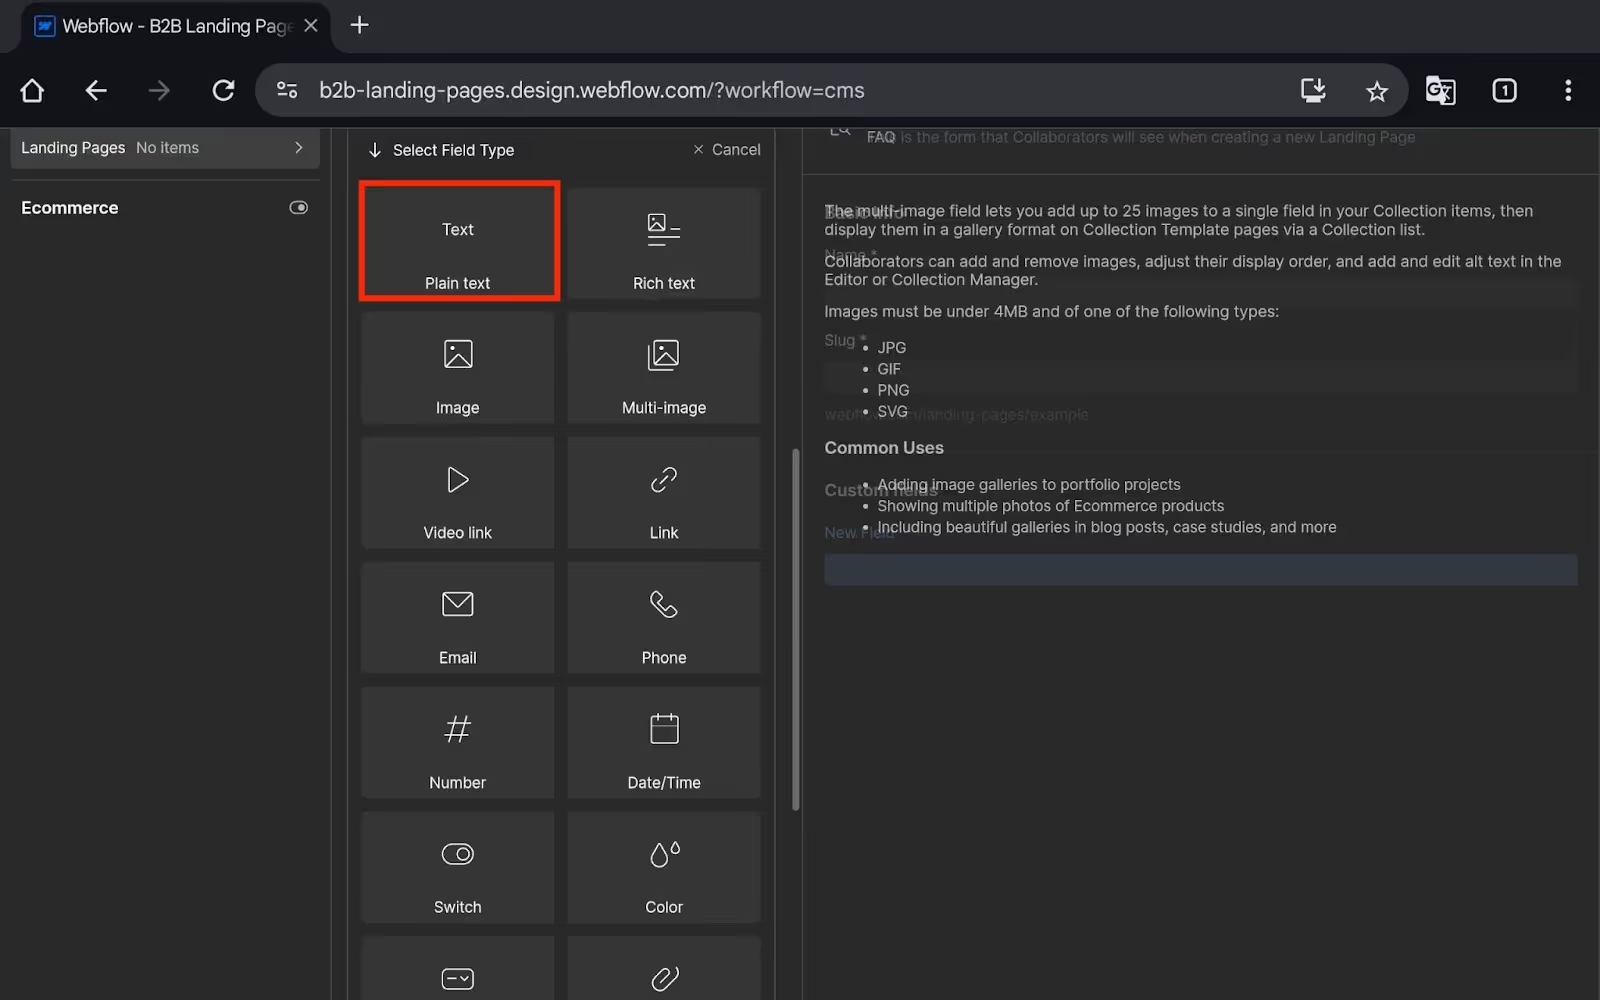
- Now click Add New Field.
- Then you will have to choose the field type. Here are the fields we will use-
- Basic Company Info:
- Company Name (Plain Text) - required
- Company Logo (Image) - for the hero section
- Website URL (Plain Text) - link to their site
- Industry (Plain Text) - for segmentation
- Landing Page Content:
- Hero Headline (Plain Text) - "Accelerate sales with AI."
- Subheadline (Plain Text) - supporting text
- Value Proposition (Rich Text) - main benefit copy
- Primary CTA Text (Plain Text) - button text like "Get Demo."
- Personalization Data:
- Primary CRM (Plain Text) - HubSpot, Salesforce, etc.
- Company Size (Plain Text) - Enterprise, Mid-Market, Startup
- Brand Color (Color) - their brand color for accent
- Testimonial Text (Rich Text) - relevant social proof
- For Clay Sync:
- Clay ID (Plain Text) - unique identifier from Clay
- Slug (Plain Text or Slug field) - for URL generation
- Basic Company Info:
Note- These are just the examples; you can add fields as per your choice.
- For now, let’s add Company Name. For this, select Plain Text.
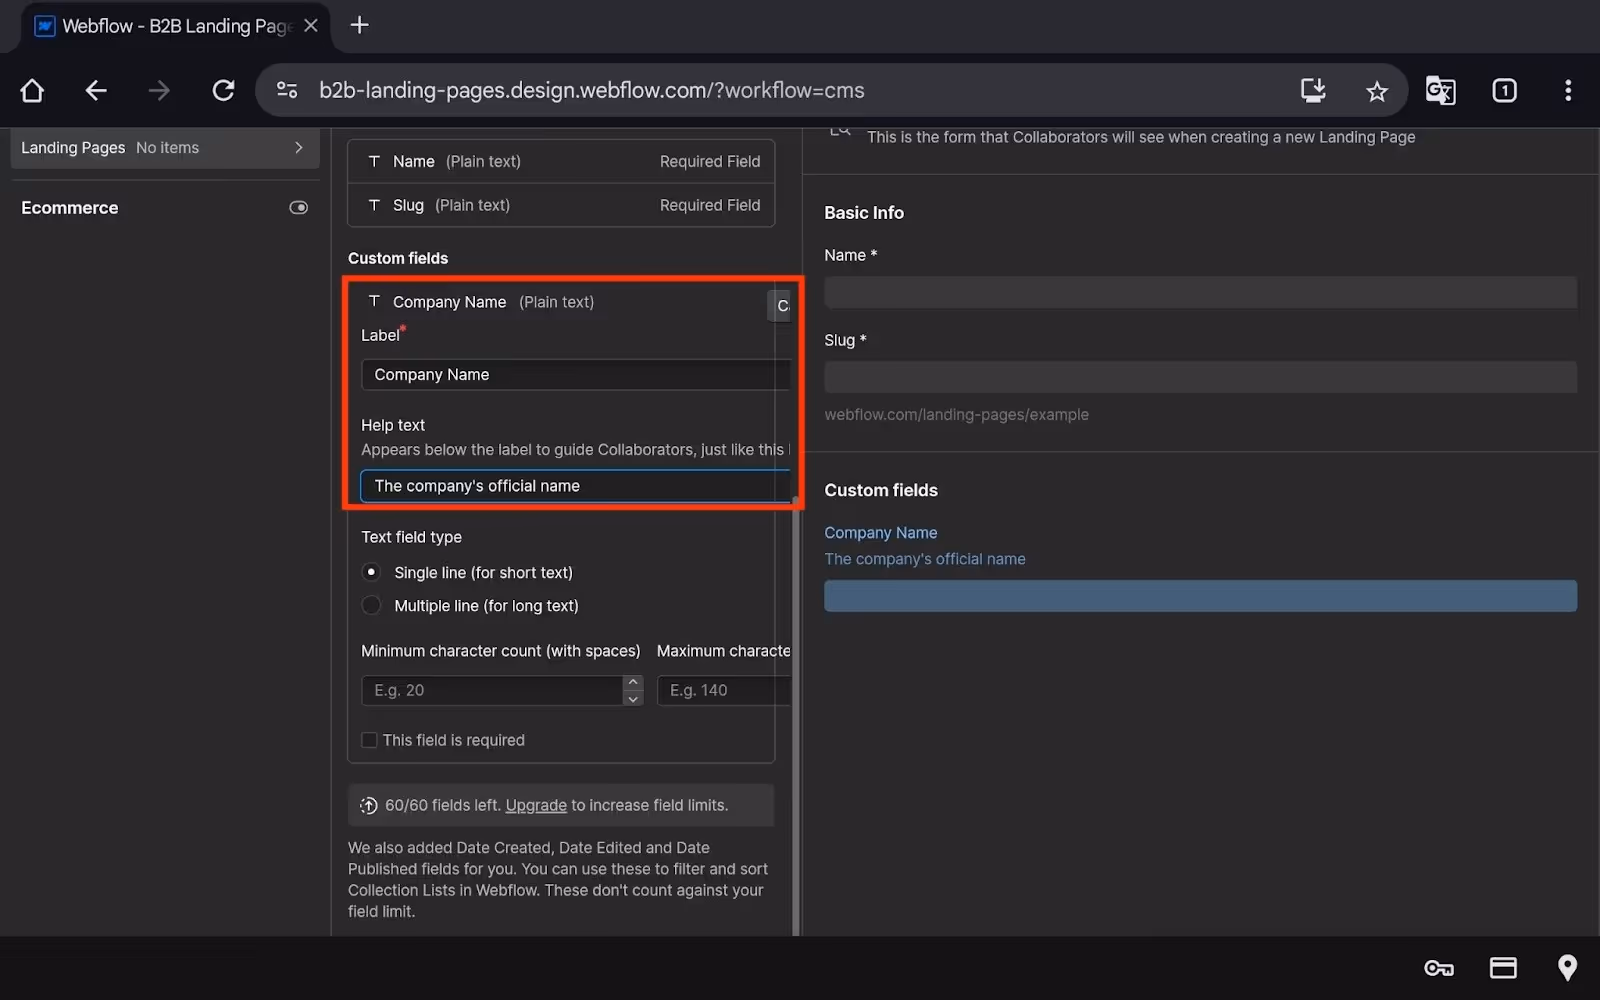
- Enter the following details:
- Label- Company Name
- Help Text- The company’s official name.
- Once done, click Save Field.
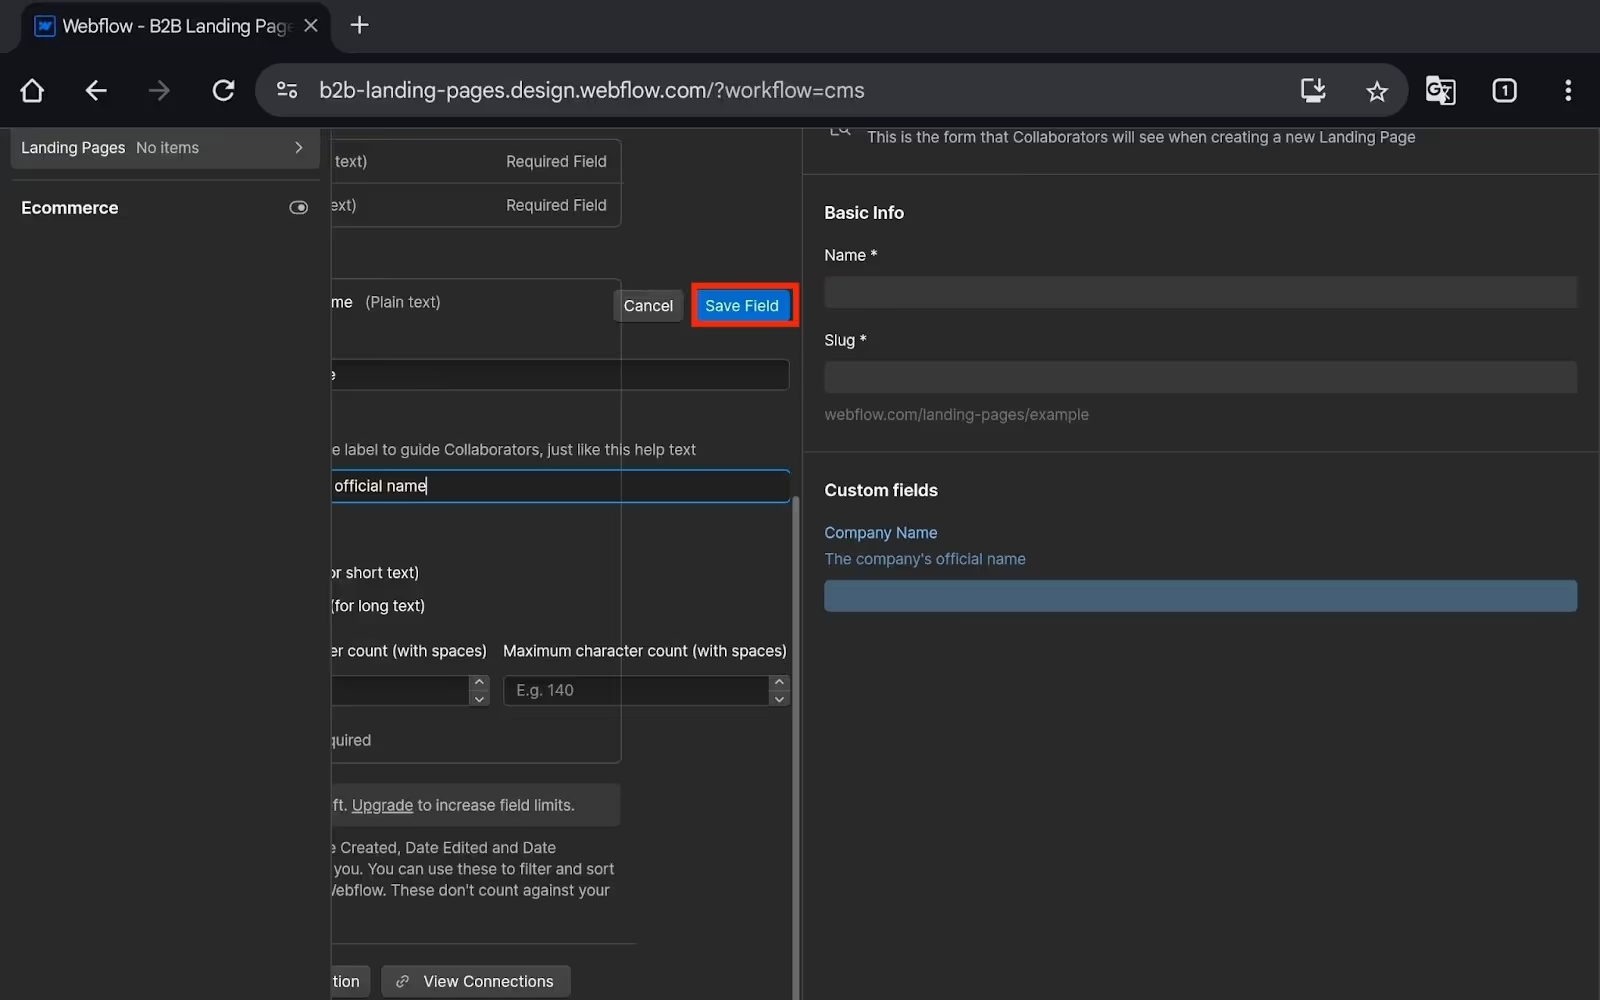
- Similarly, you can add all the fields we have mentioned above.
- After all this is done, click Save Collection.
Now, after this, you need to test the collection item. This helps you verify that binding works before Clay pushes real data.
Here’s how:
- Click on your Collection Name, i.e., Landing Pages.
- Now, click Create New Item.
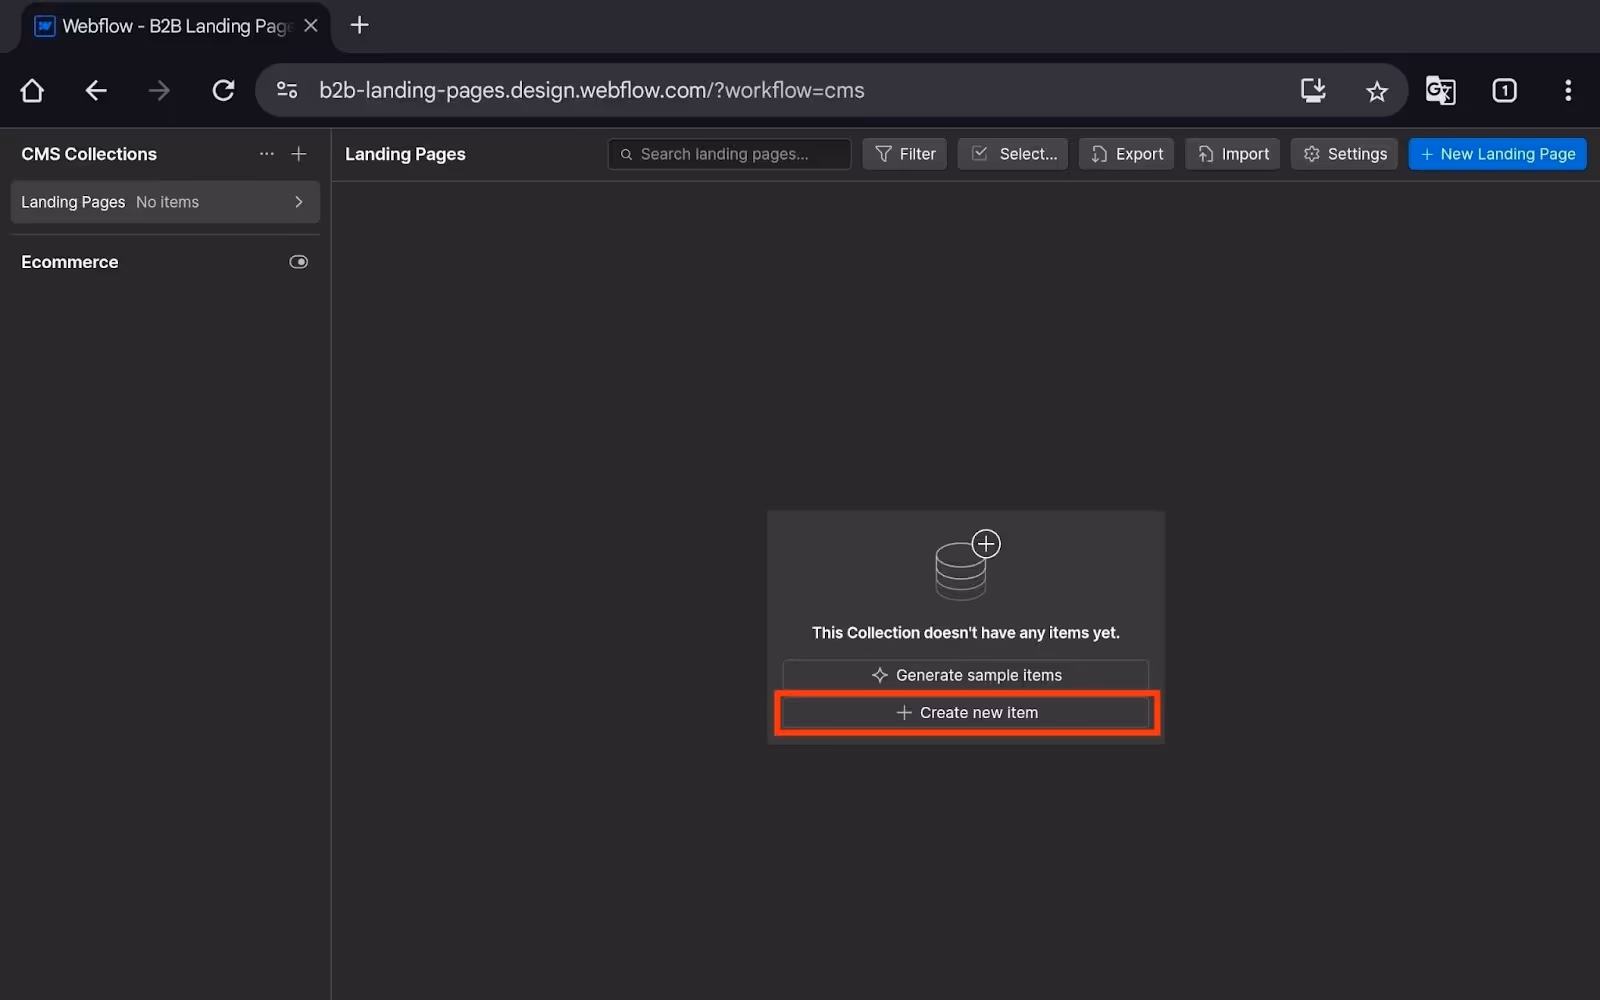
- You will see a form with the fields. Fill out this form and click Create Draft.
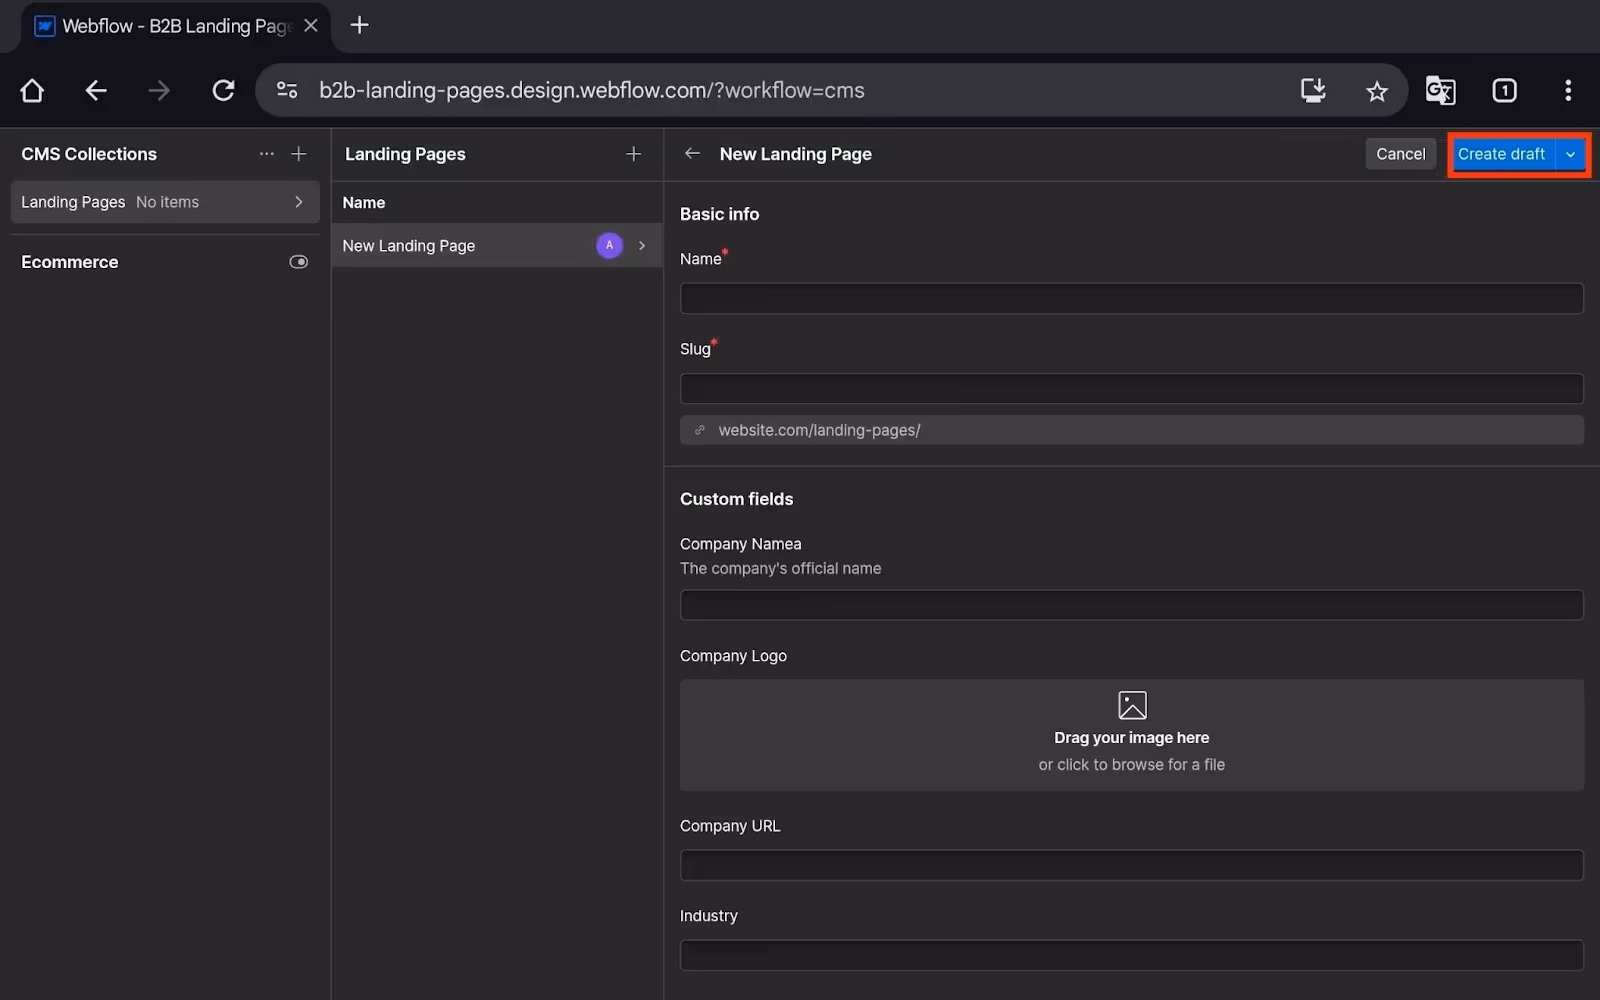
- This will create a test item to see if the binding is working or not.
Step 2: Design your Landing Page Template
Once you have your CMS set up, you need to create and design your new landing page template.
Follow the steps given below to do that:
- Go to the Design tab at the top.
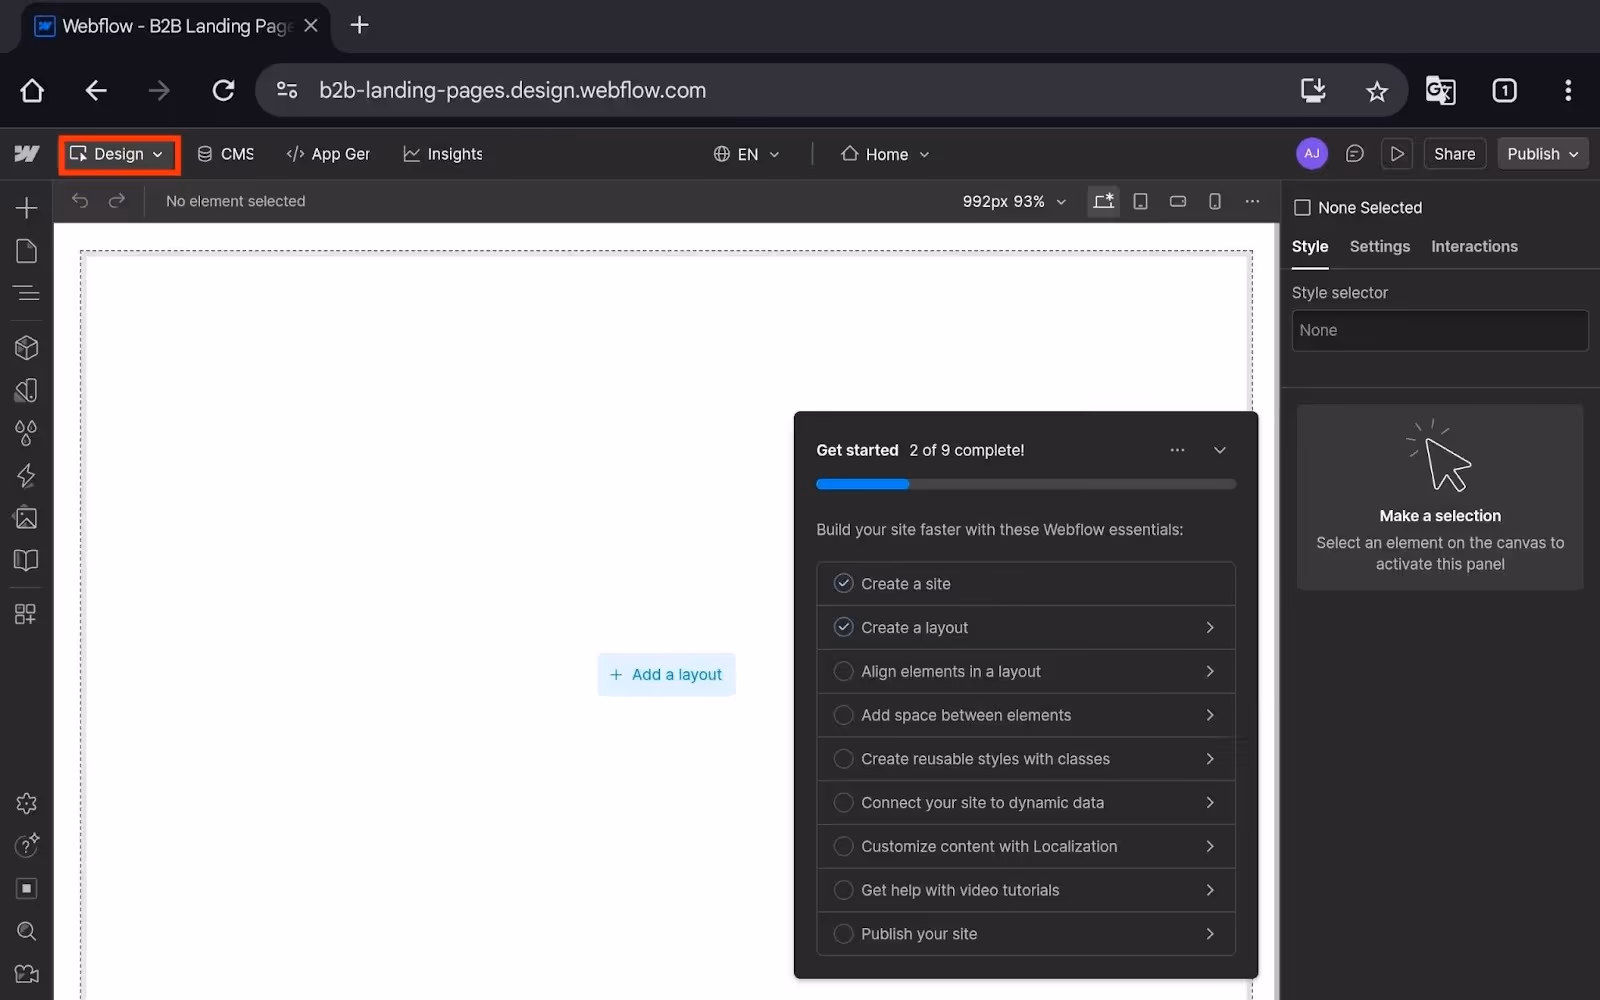
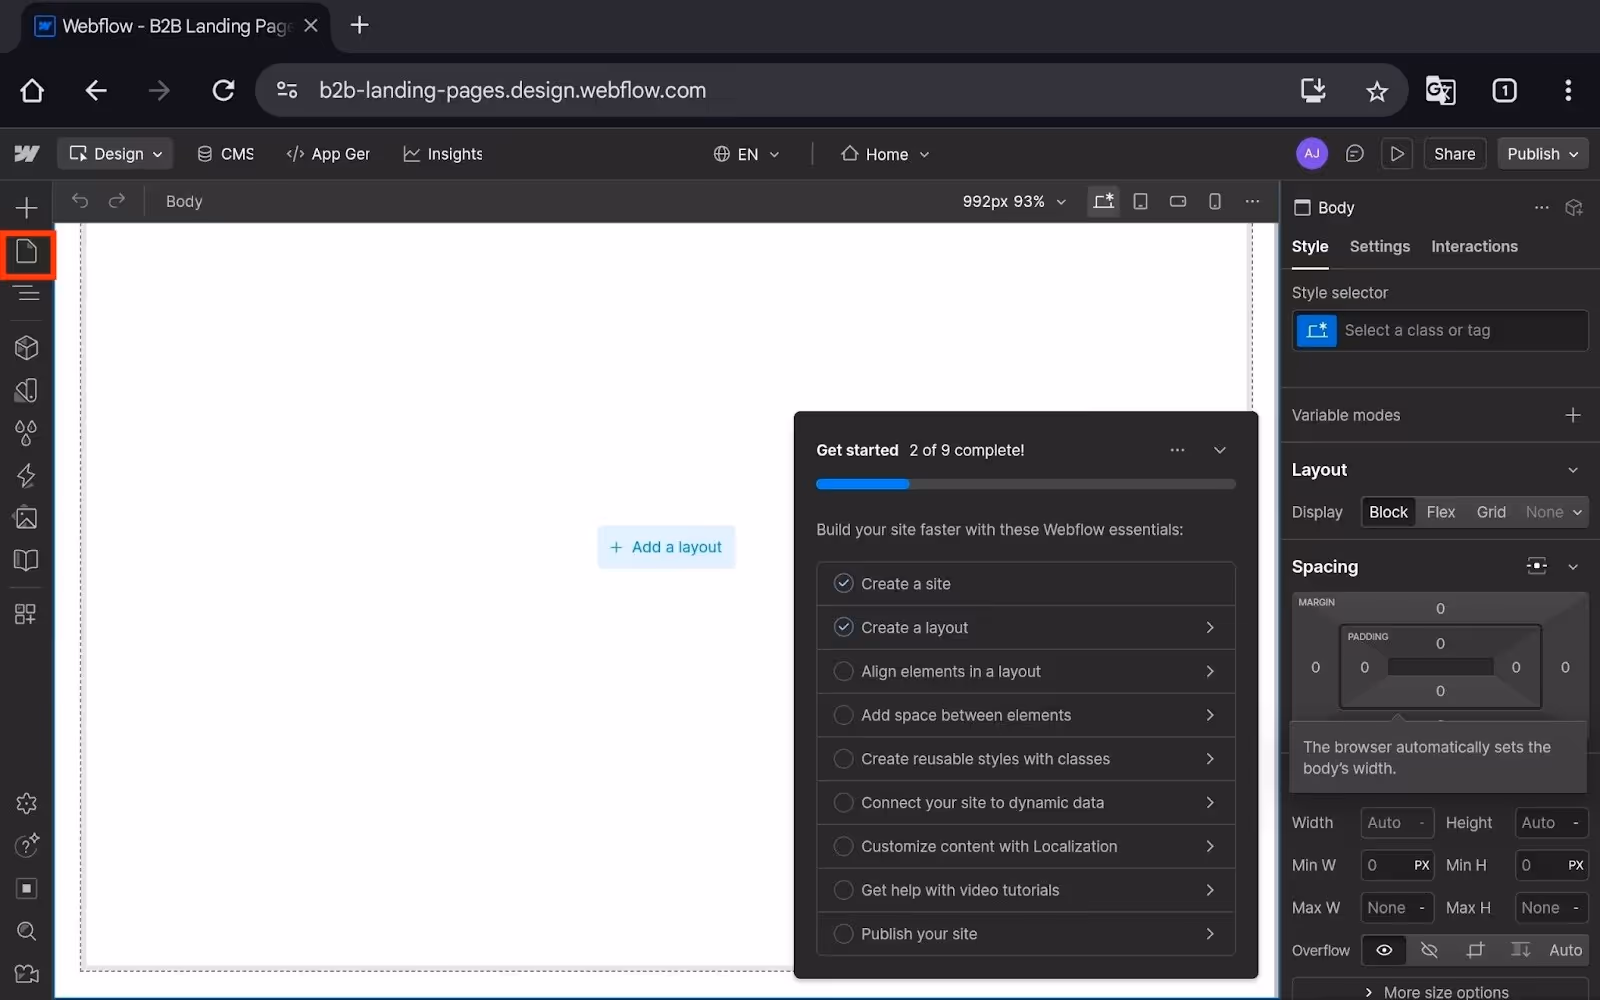
- On the left pane, click Pages.
- You will see the Landing Pages Template here; click on the + button next to it.
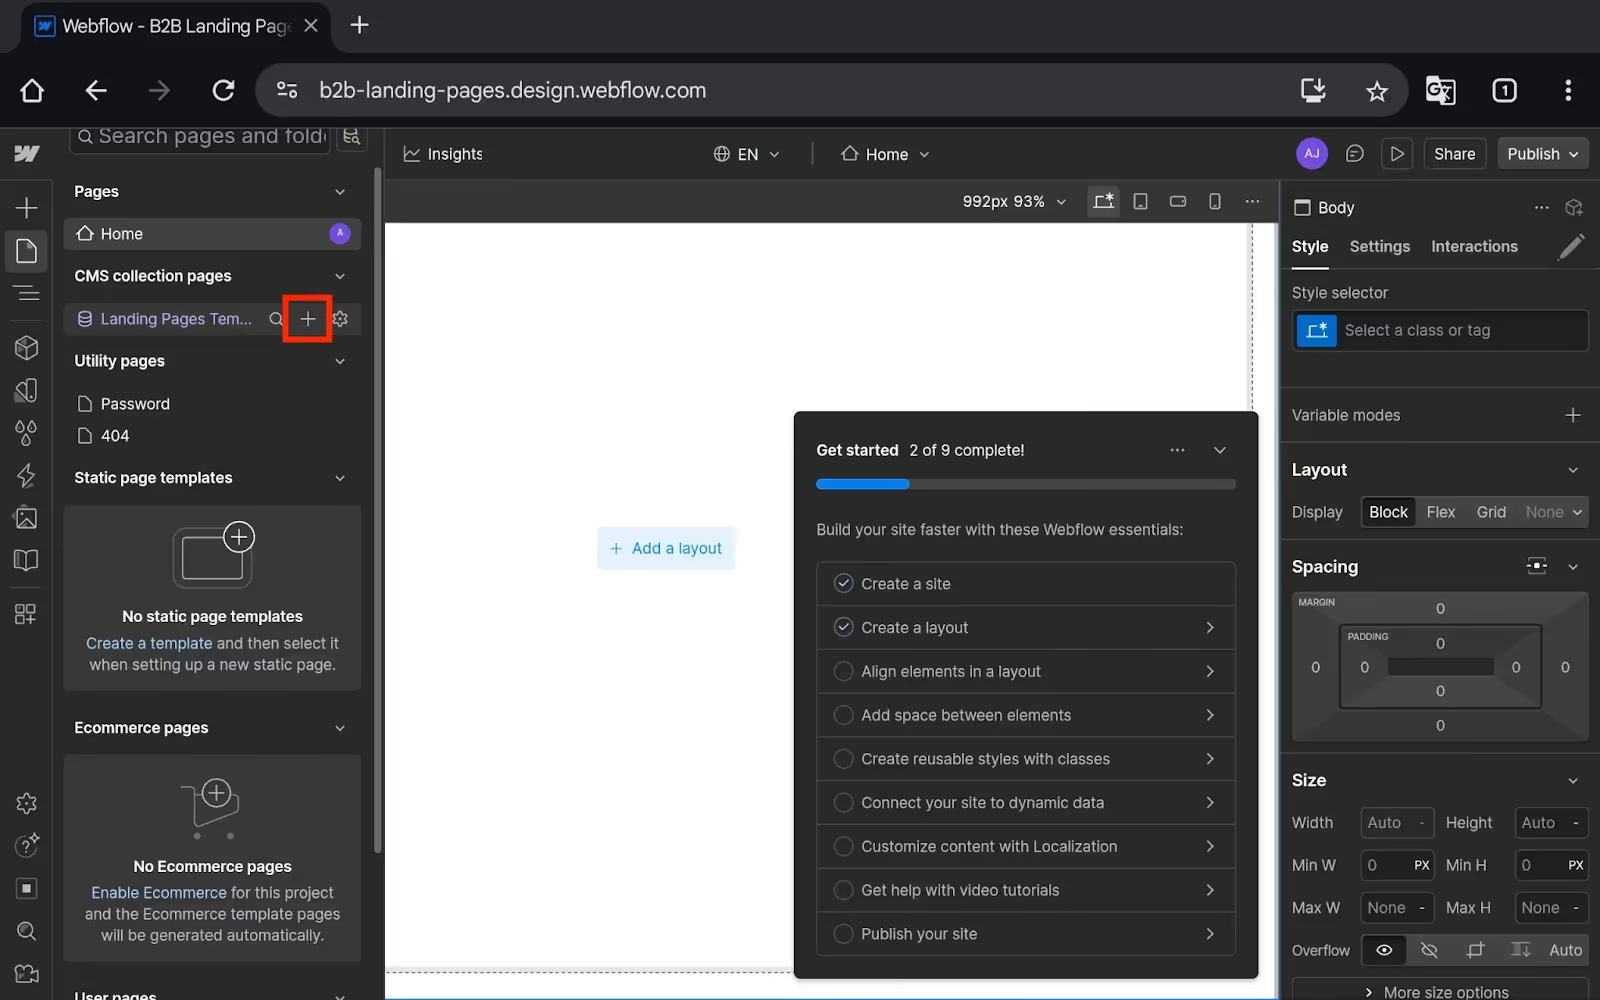
- You will now see two options:
- Create a new Landing Pages page: With this option, you will have to build the landing page from scratch.
- Generate new Landing Pages page: If you select this option, then AI will generate a landing page template for you.
- I recommend using the Generate new Landing Pages page option.

- Now, click the "Generate without a prompt” button.

- This will now create a landing page template; select it.
- Now click Add a Layout.
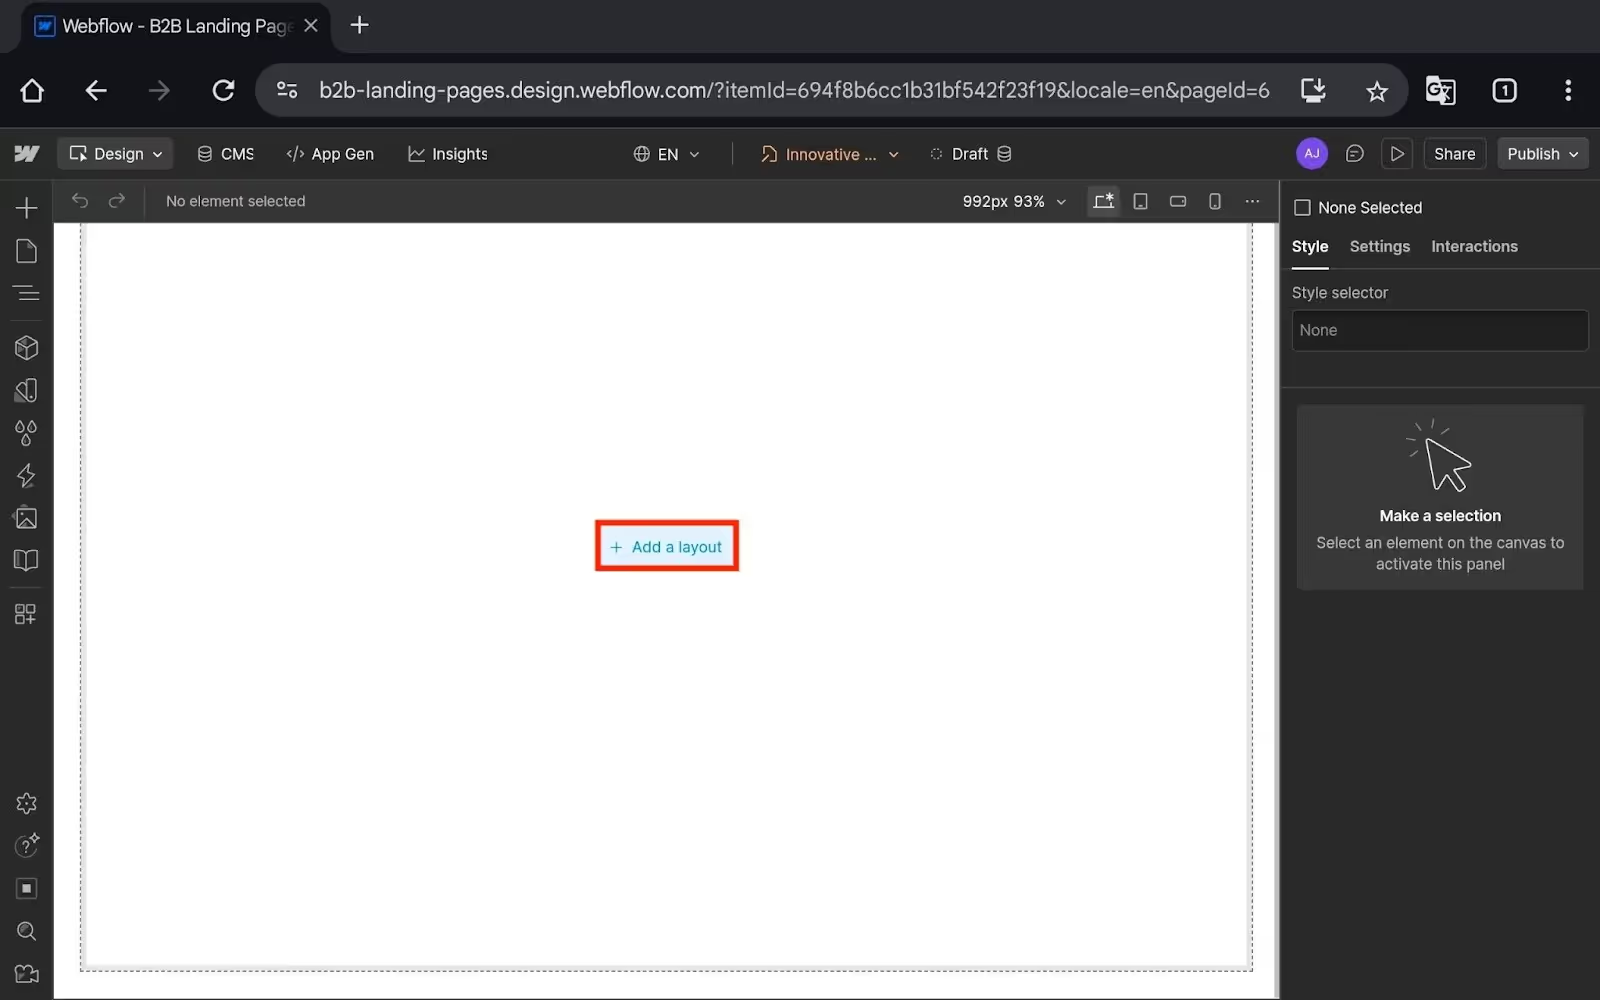
- You will now see layout options like-
- Navigation
- Hero
- Team
- Logos
- Gallery
- Features
- Pricing
- Testimonial
- Footer, etc.
- For now, select one of the Hero Layouts to start.
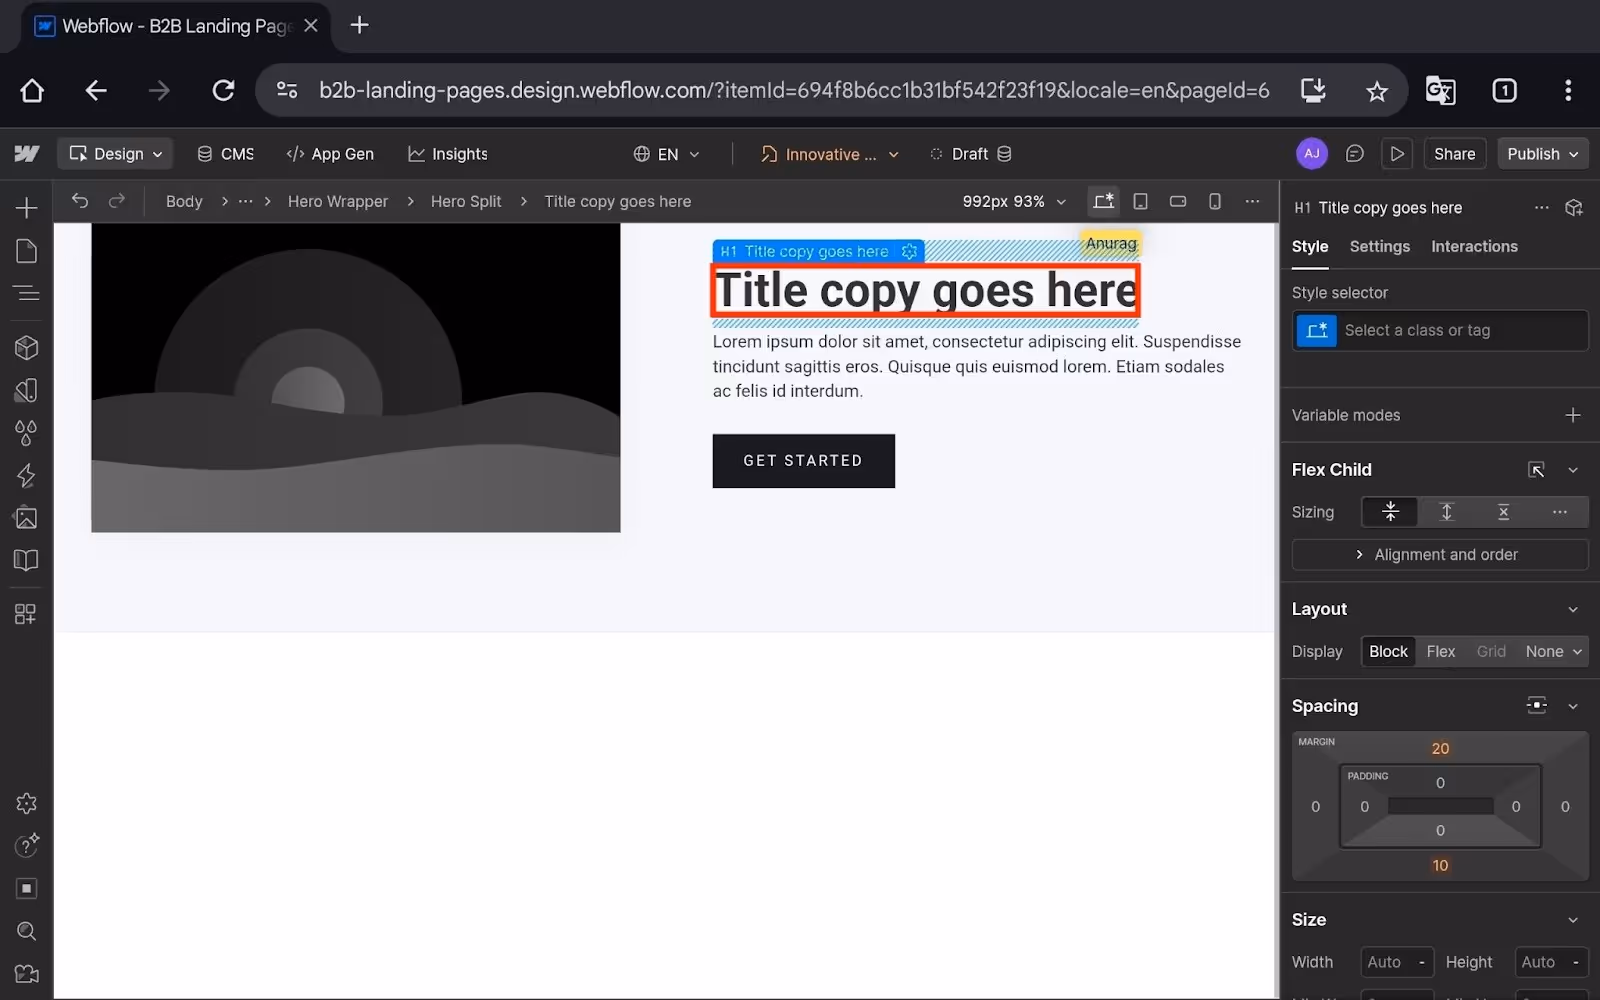
- Now select the Hero Headline (which will be the title).
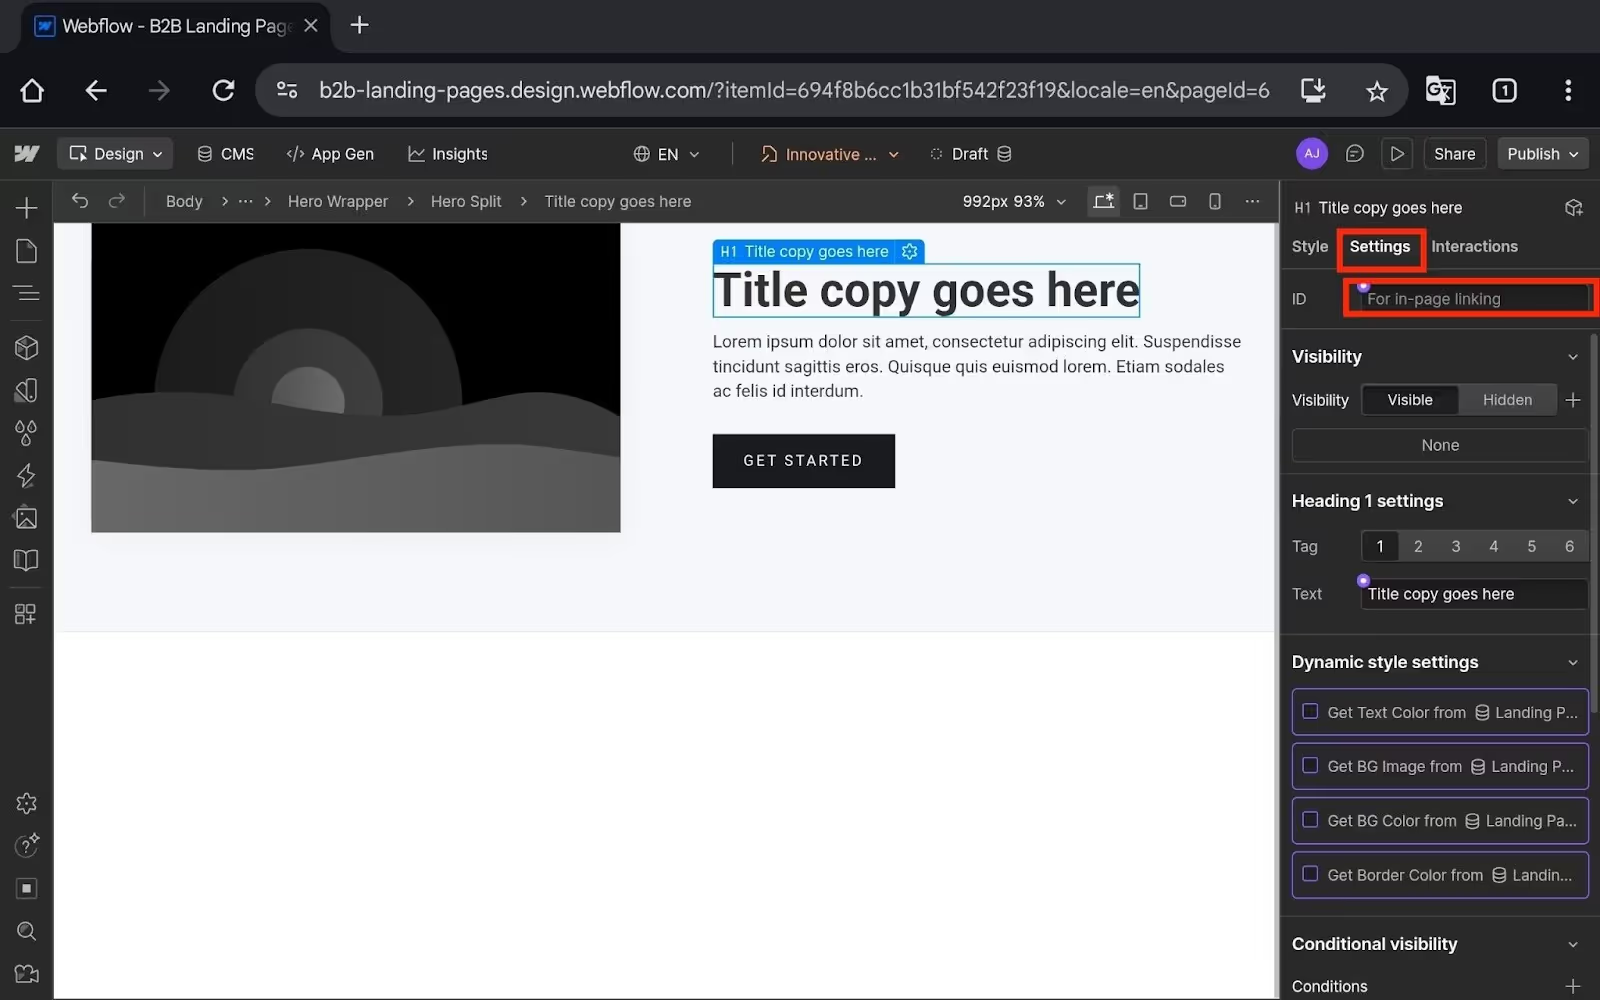
- On the right pane, select Settings.
- In the top left corner of the ID, you will see a small purple dot; click on it.
- Now, from the drop-down menu, select Hero Headline.
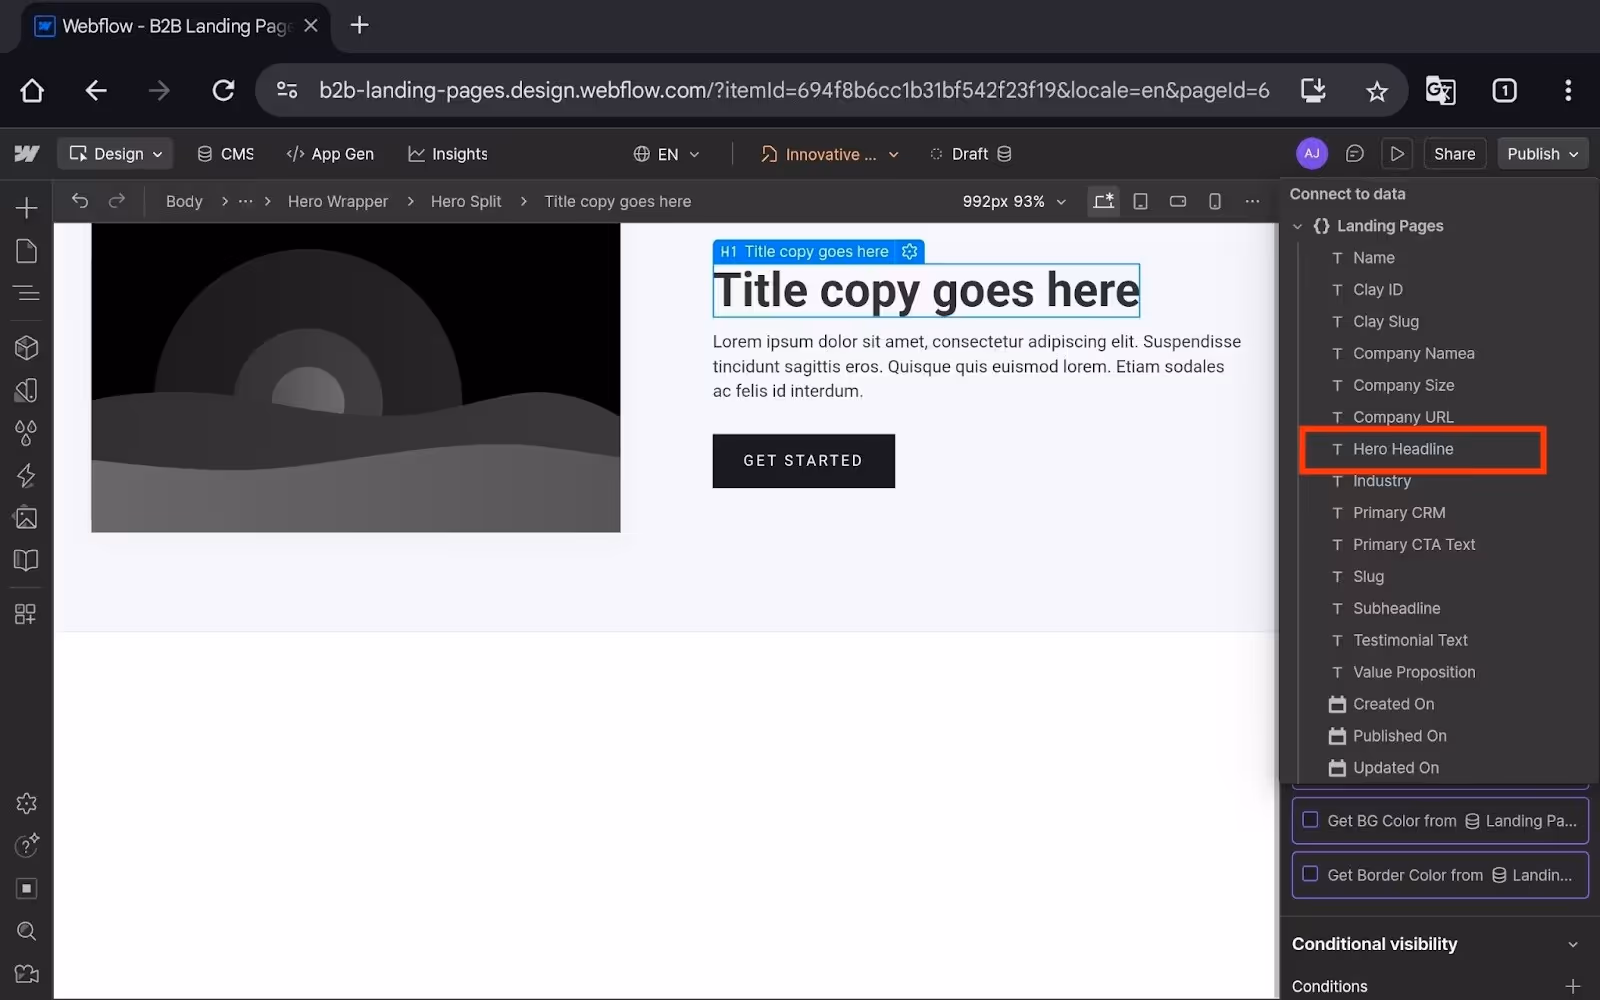
- Now, similarly, add these sections and bind them to the other Collection Fields we saved earlier in Step 1.
- You will have to add these sections to the template:
- Subheadline
- Value proposition
- Features
- CTA
- Navigation
- Footer, etc.
- Once done, click Publish to post it.
Note- We are not talking about the design part here. You can add and arrange sections as per your requirements.
Our main aim here is to help you create dynamic pages with variable data.
Step 3: Set up Clay (Find and Enrich Data)
In this part of our guide, we will set up Clay and use it to fetch the data of the companies or in other words, our desired prospects.
So first, let’s see how you can find the data using Clay:
- Log into your Clay account on the browser.
- Now click the New button.
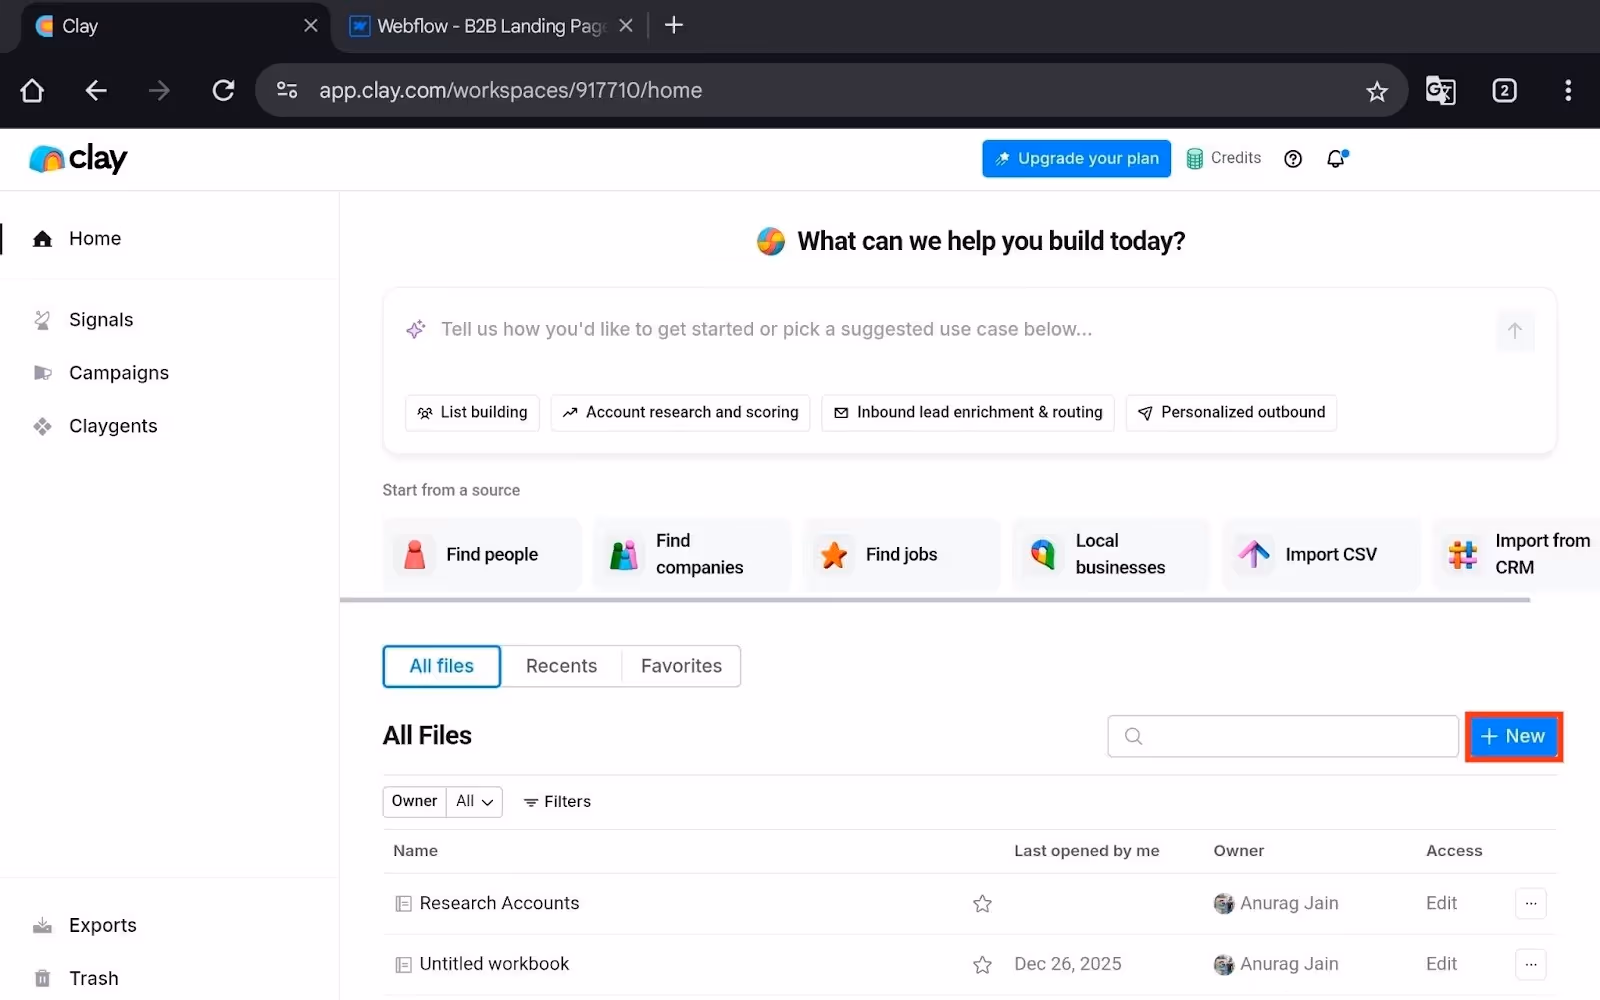
- Select Workbook.
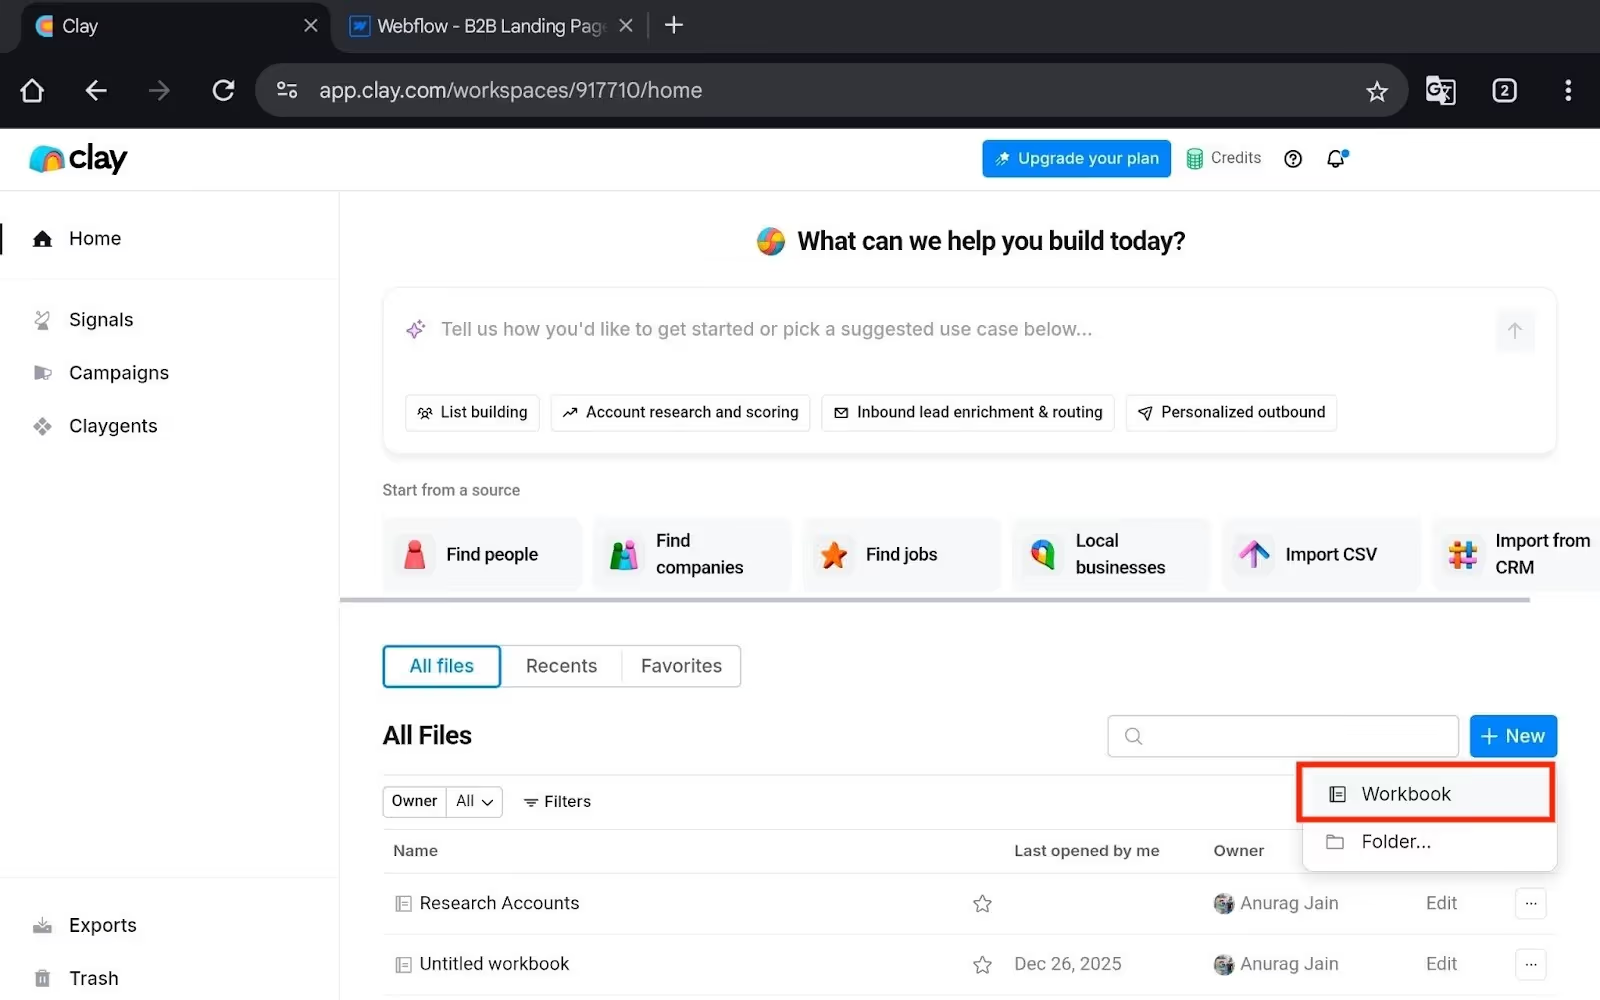
- Name the workbook: Landing Page Companies.
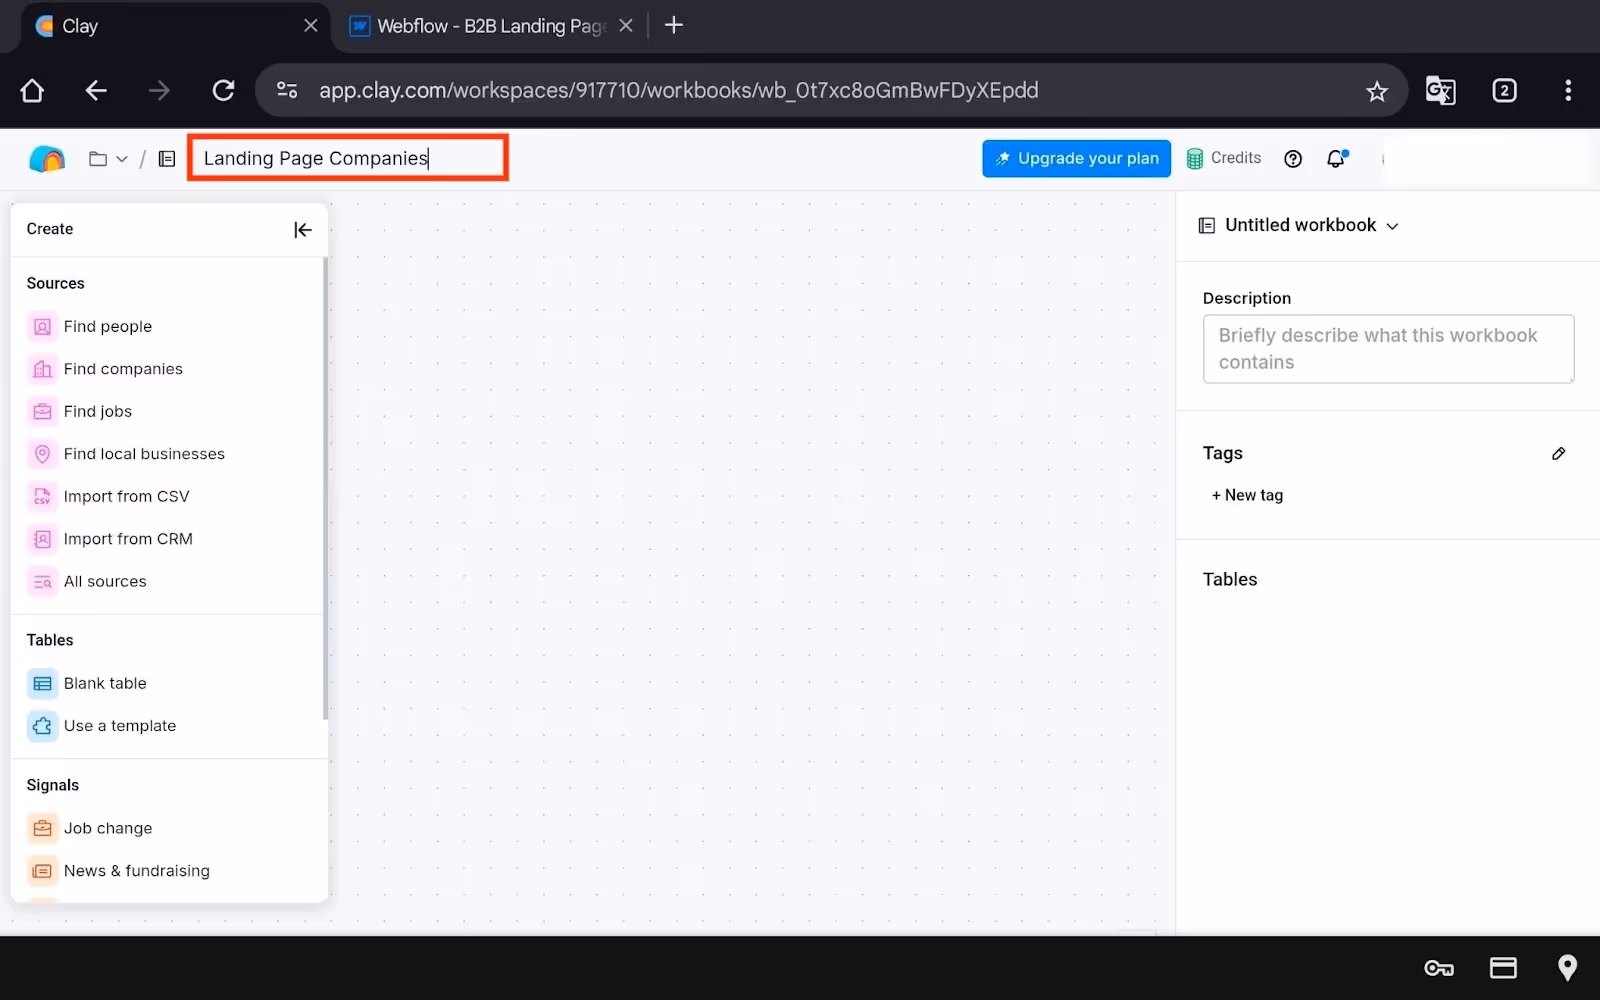
- Then click the Find Companies option. You will now have to set the filters.
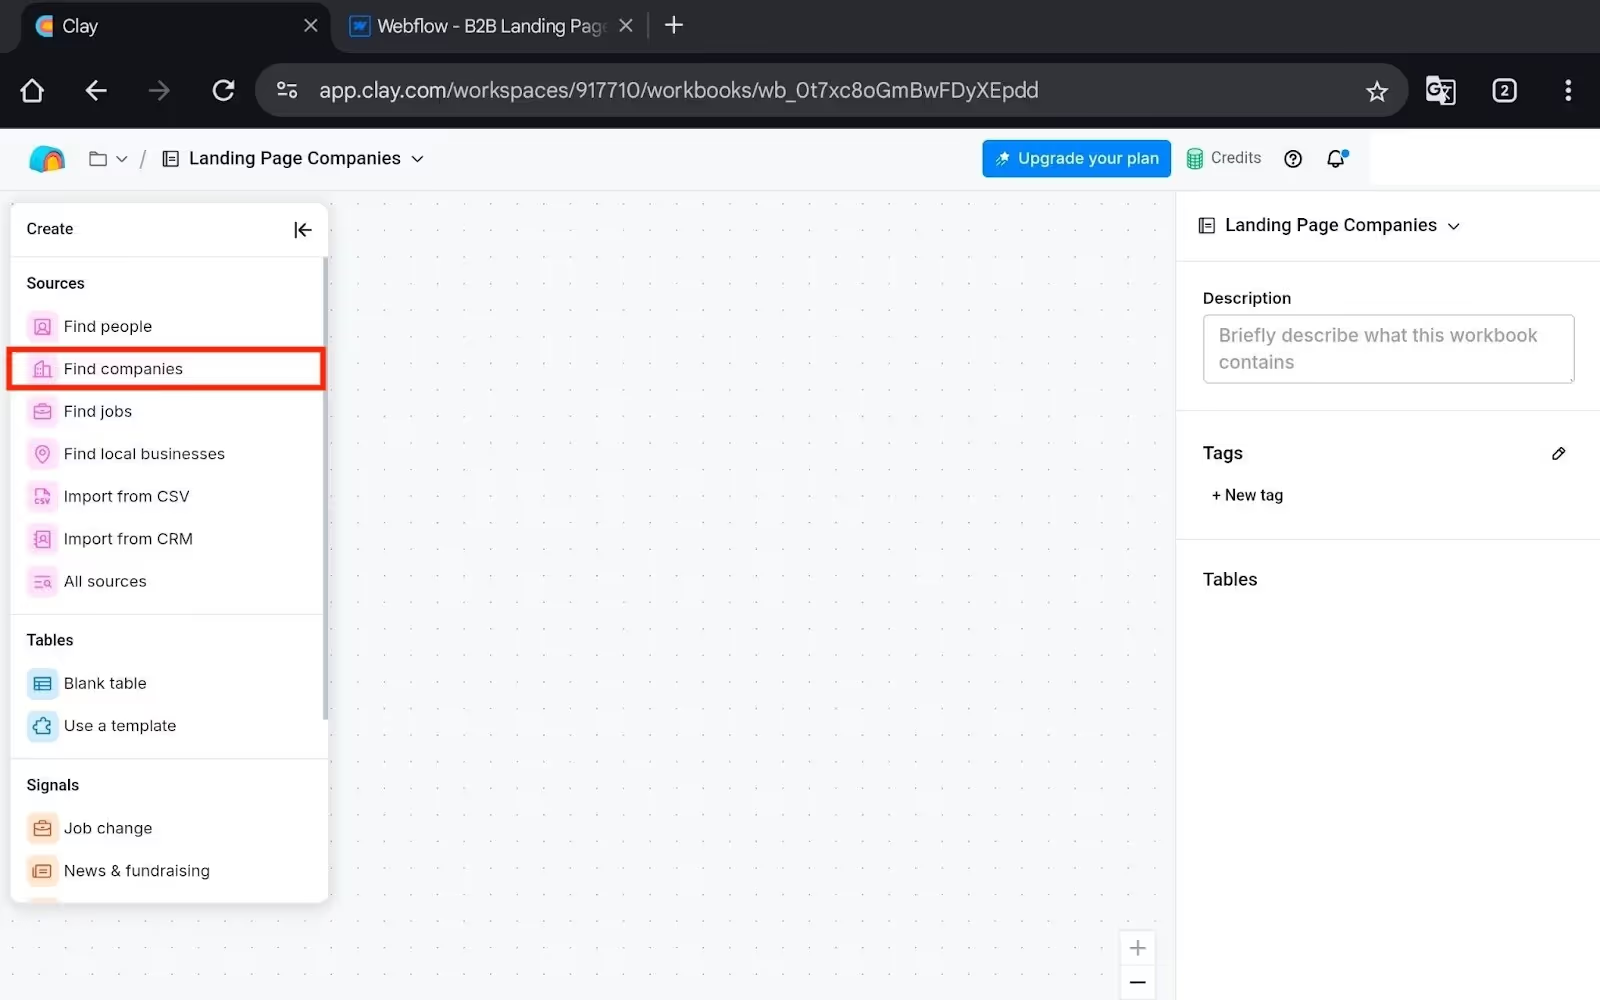
- Set your filters:
- Industries to Include: (e.g., Software Development)
- Industries to Exclude: (optional, e.g., Healthcare, SaaS, Finance)
- Company Size: (e.g., 51-200 employees)
- Location: (e.g., United States)
- Annual Revenue: (optional, e.g., $10M-$25M)

- There will be a lot of filters, so set them as per your requirements.
- Once you set the filters, Clay will show you all the companies; review them.
- Click Continue and click Import to New Table.

- Once you do that, it will create a table with your data.
- If you want to add more info to Clay before syncing to Webflow, then click "Add Column."
- Name the column (e.g., "Primary CRM", "Industry Focus").
- You can manually fill these in or use enrichments.
After this, you need to add Enrichments to your table. You will have to fetch emails, logos, tech stacks, etc.
For this, follow these steps:
- Click on the Add Column button.
- Now, click on Add Enrichment.
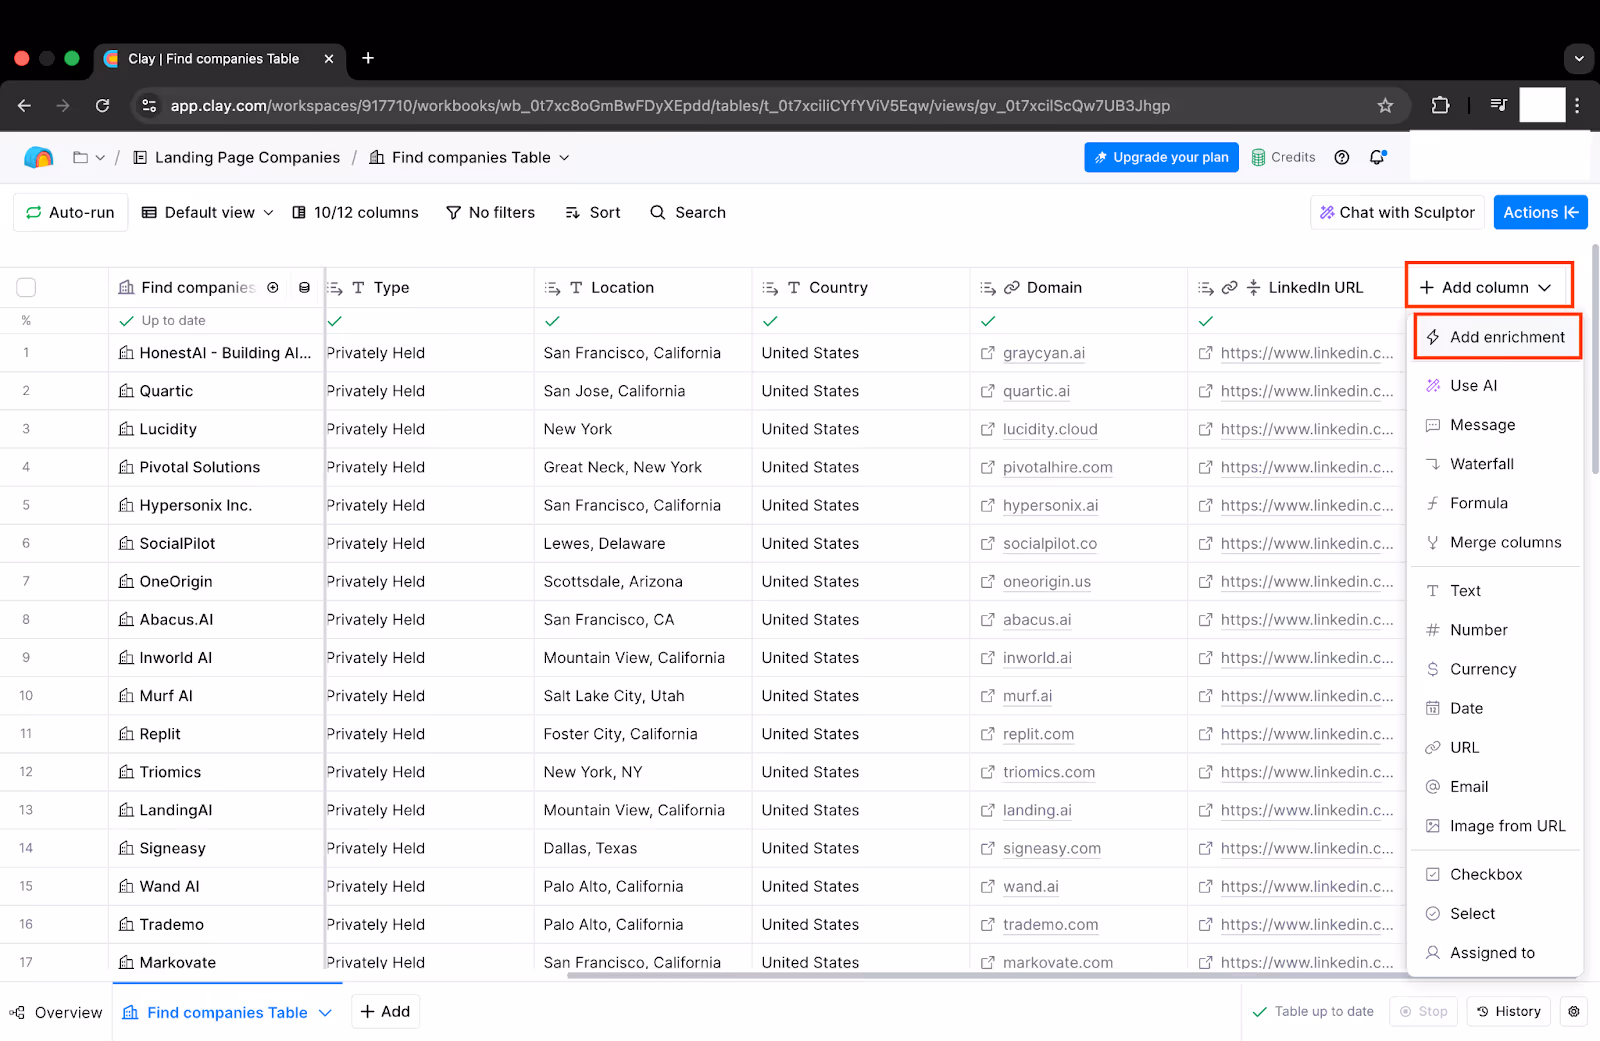
- Search for these Enrichments-
- Logos
- Brand Colors
- Company Info
- Emails
- Tech Stack, etc.

- Select each configuration one by one, and click Save, then select Save and run 10 rows.
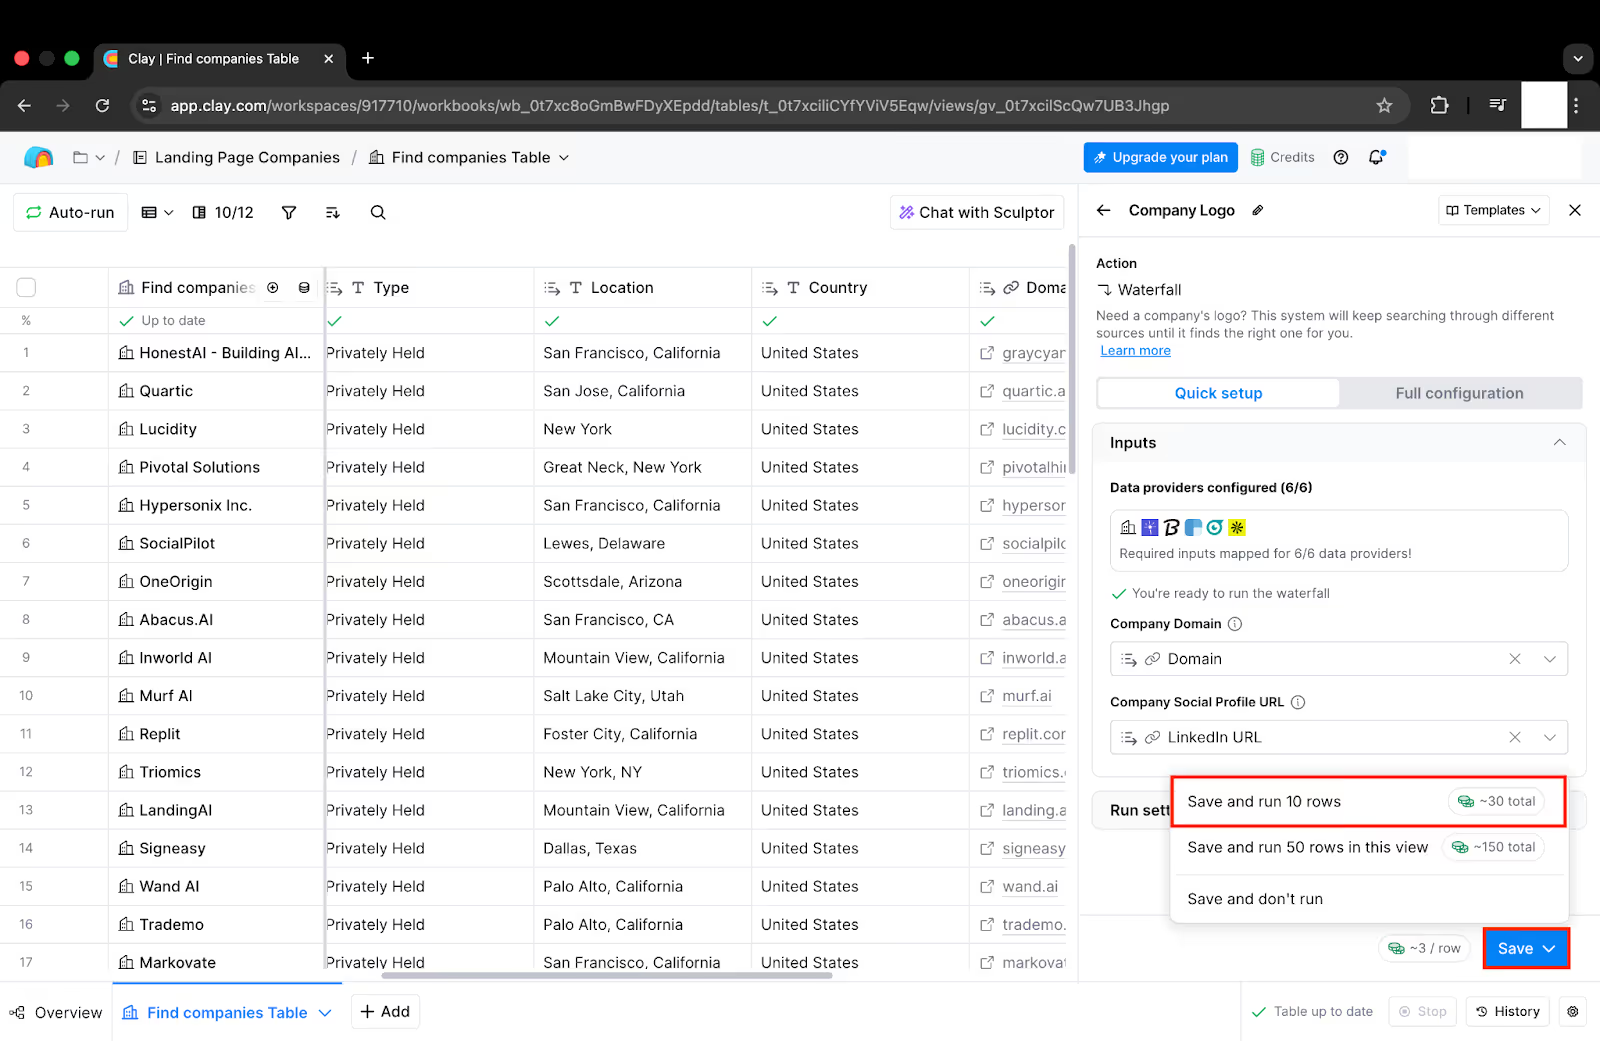
- We did this for the logo, and Clay found the logo for the 10 rows.
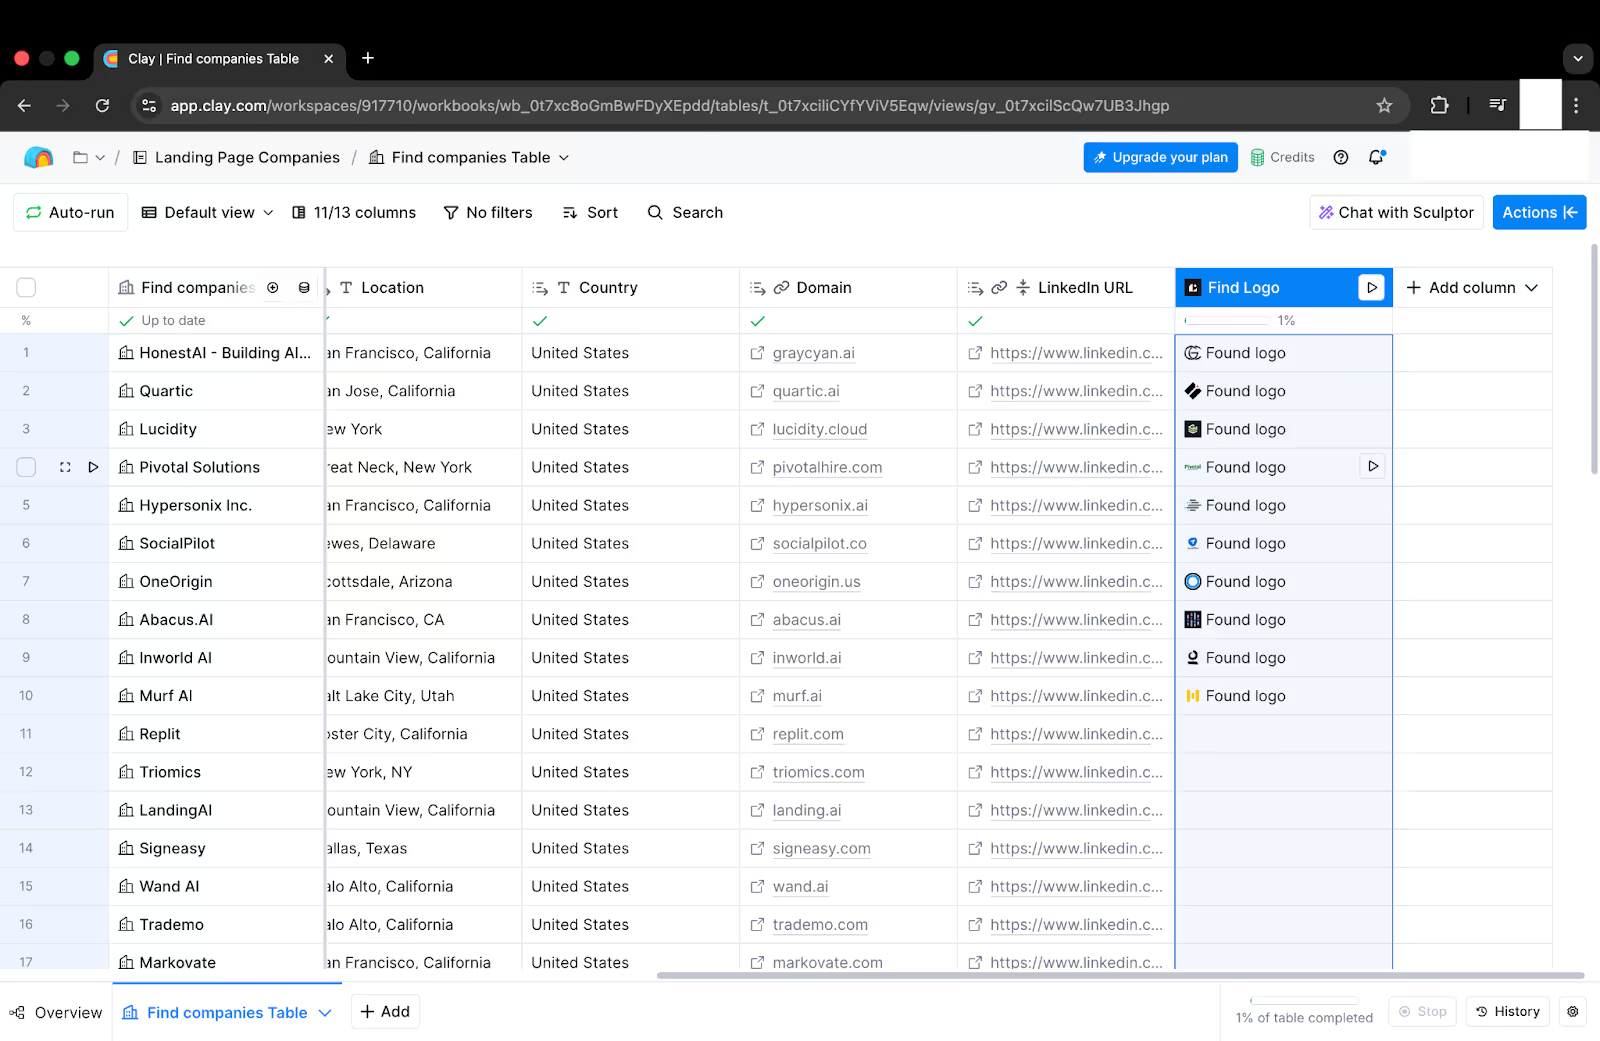
- Similarly, do this for all the enrichments.
After this, we need to generate personalized copies with AI.
Here’s how to use Clay for that:
- Click on the Add Column button, and name the Column as Hero Headline.
- Now, select Use AI.
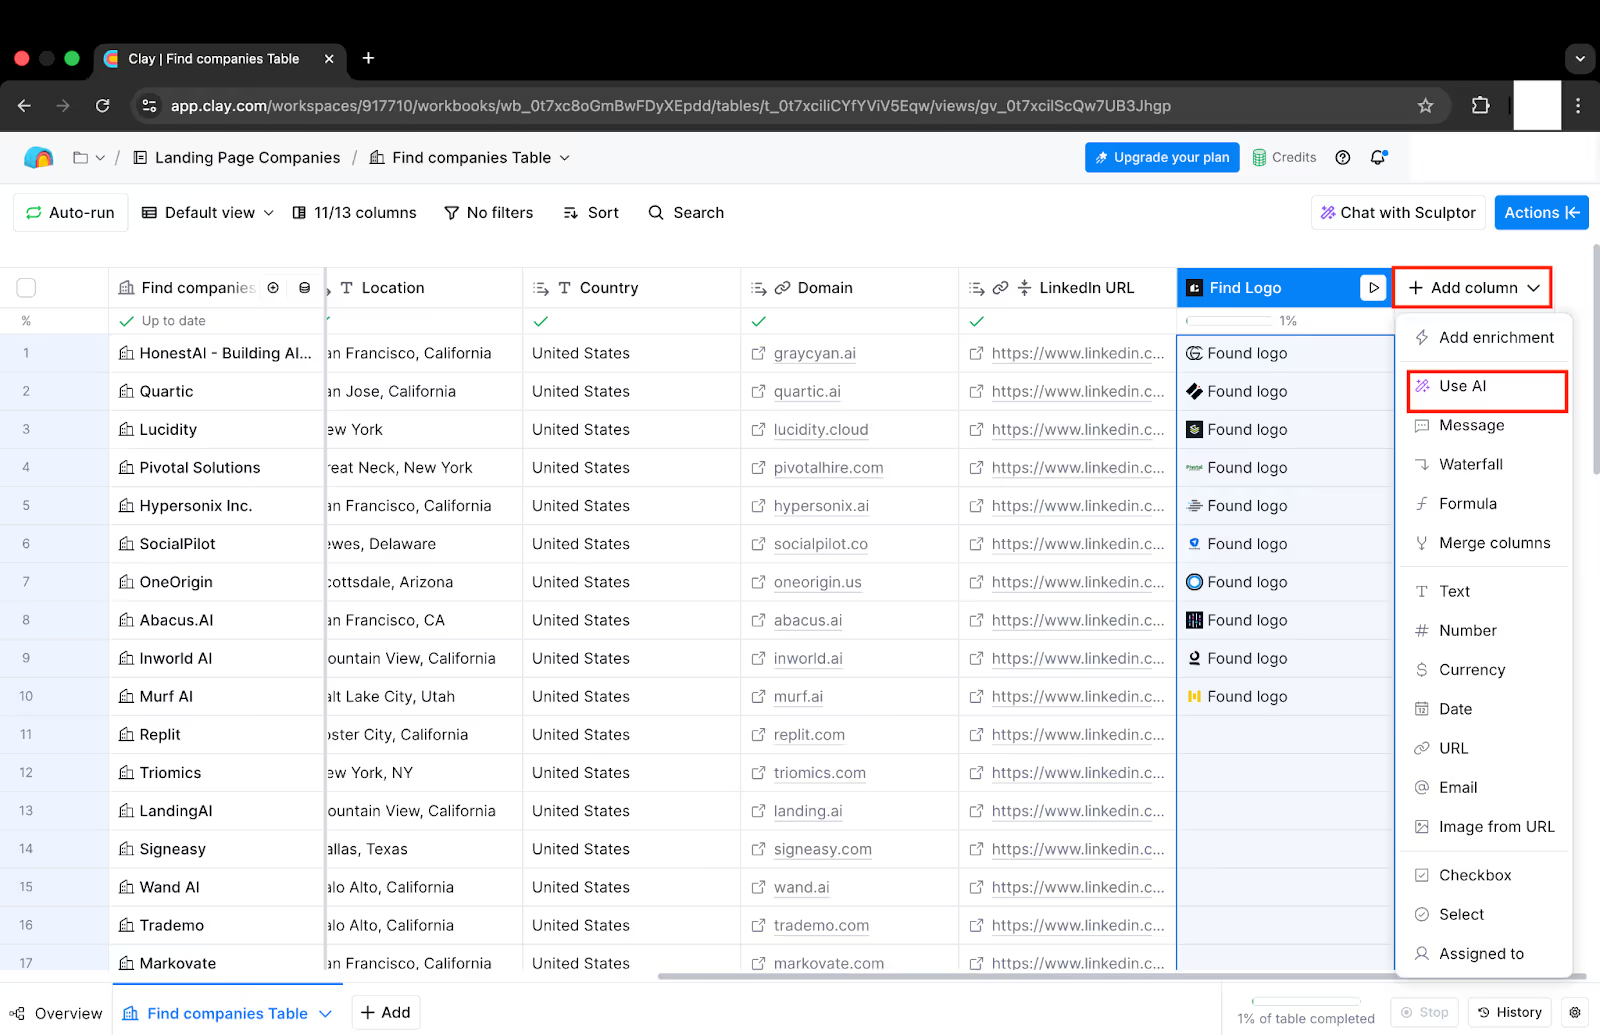
- Paste this prompt here:
- Write a compelling headline for a B2B SaaS product that helps (replace with Primary industry column) companies at (replace with size column) improve (pain point). Keep it under 10 words
- Then click Save, then select Save and run 10 rows.
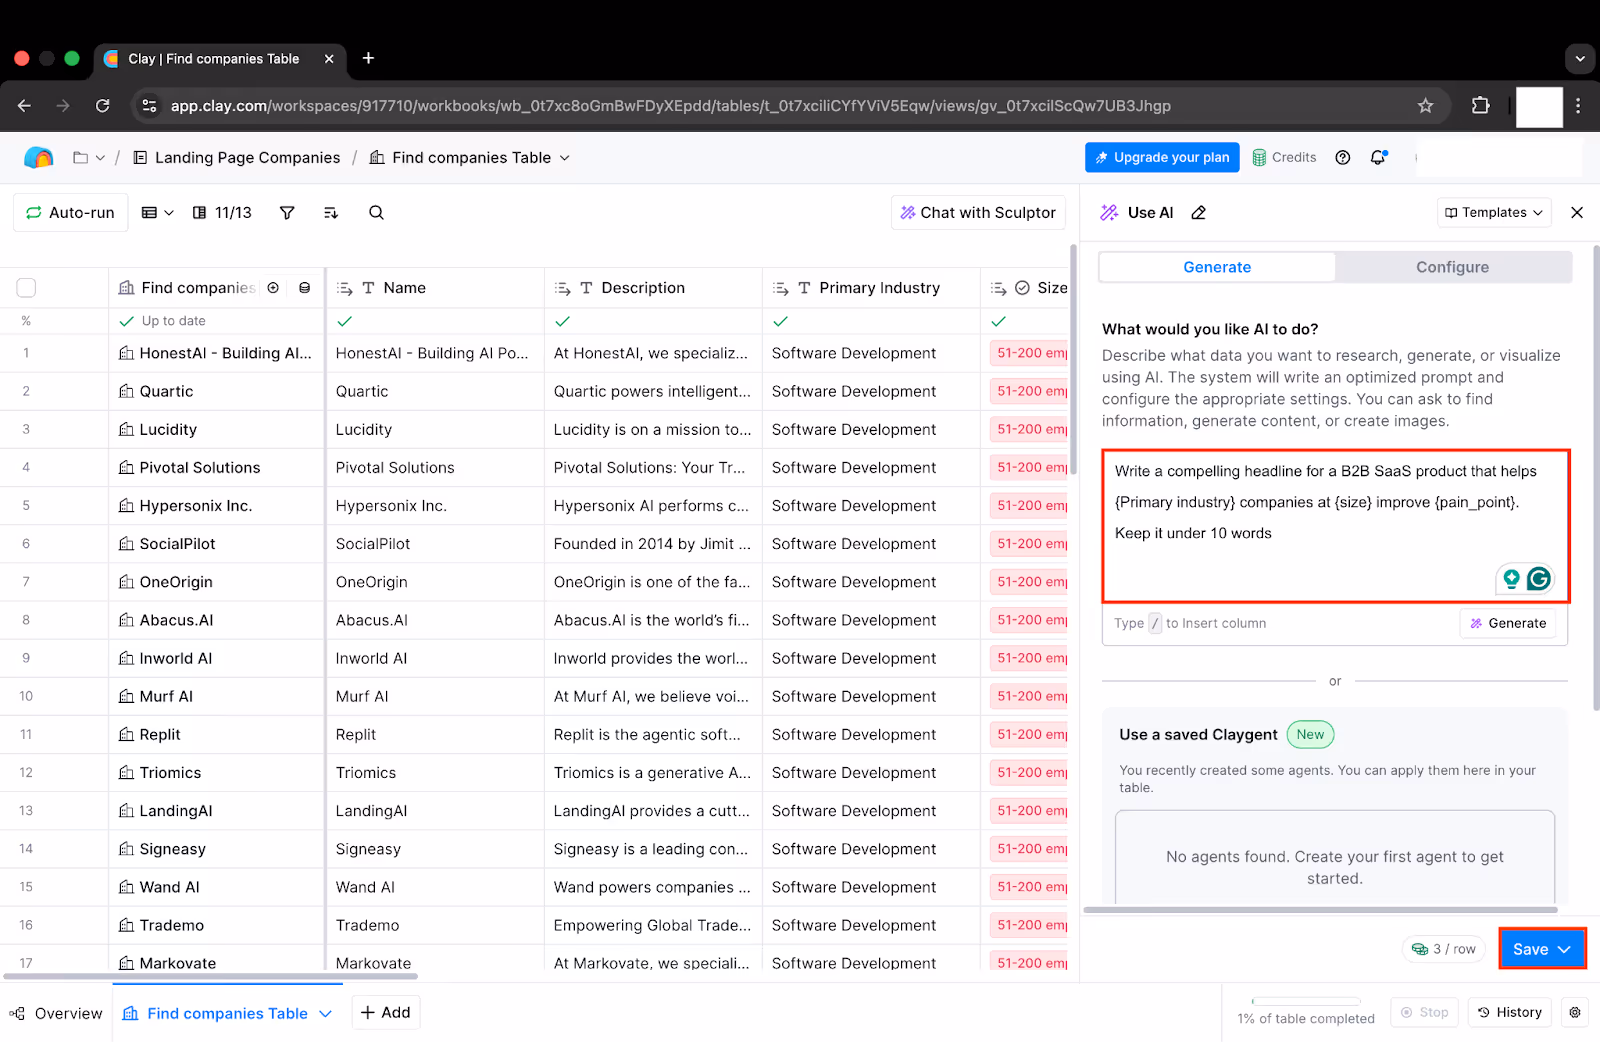
- Now this will create a Hero headline for ten rows.
- Repeat for other fields, such as:
- Subheadline
- Value Proposition
- Primary CTA Text
- Next, we need to add a Slug Column.
- Select Add Column>Formula.
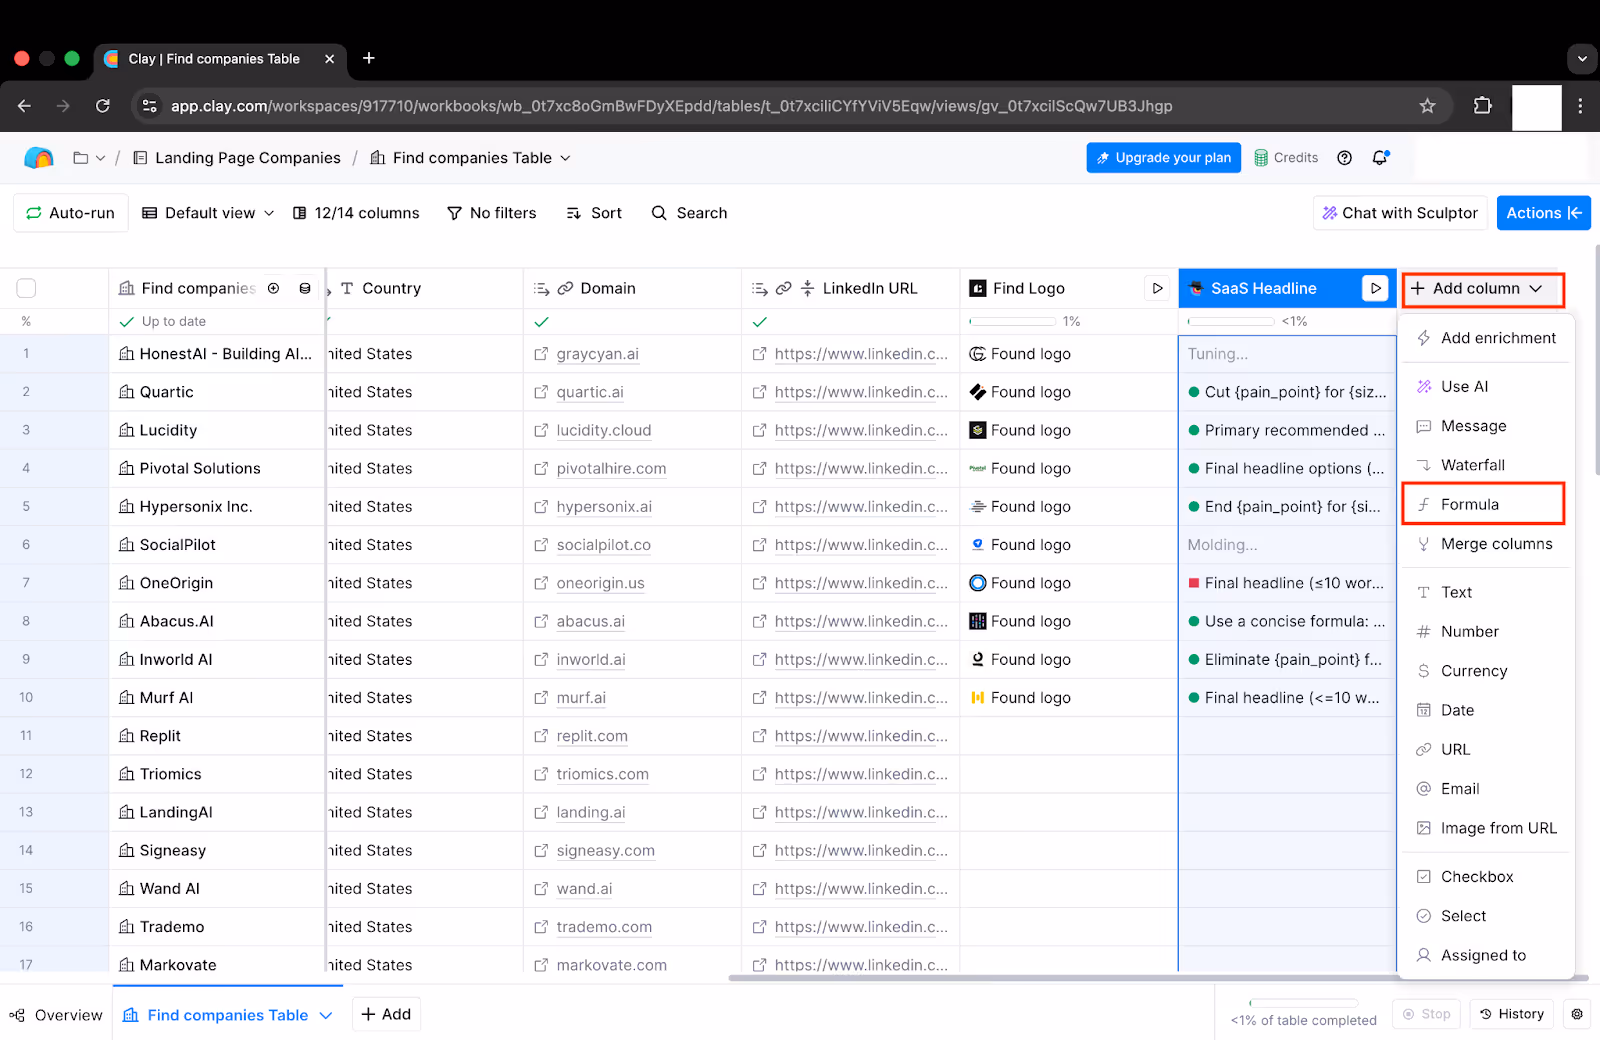
- Use this formula:
- / {replace with company_name column}.toLowerCase().replace(/\s/g, "-")
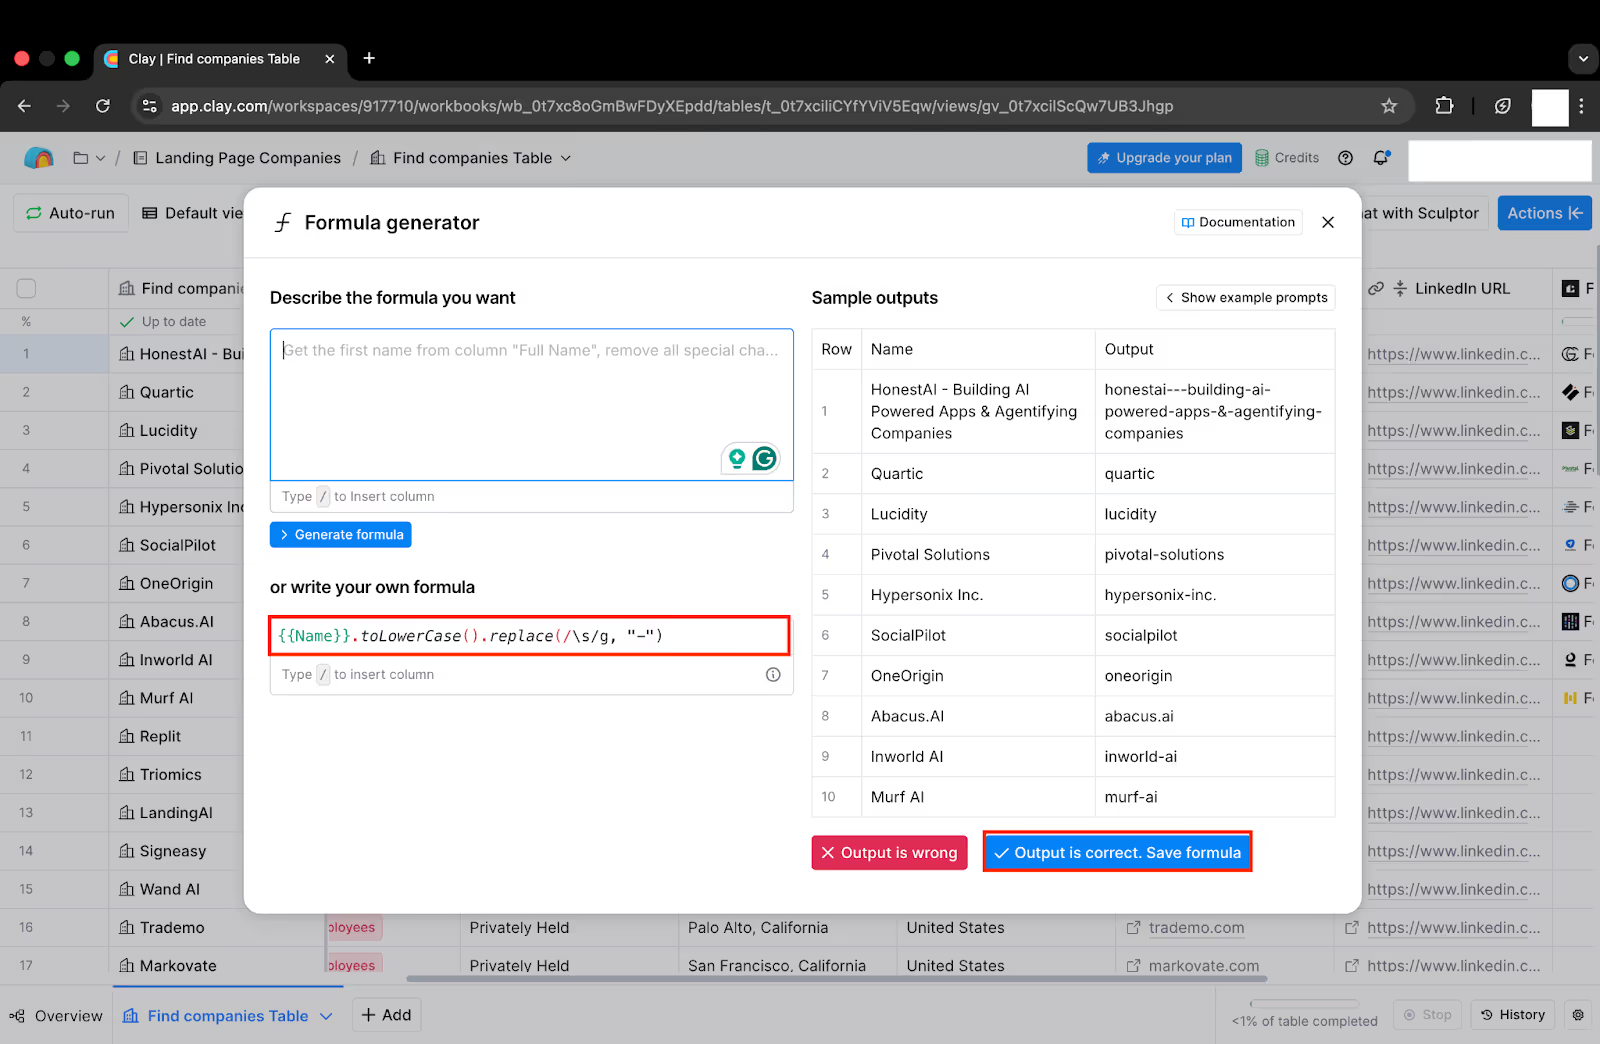
- Once done, click the "Output is Correct" button.
Step 4: Connect Clay to Webflow
Now this is the nervous system of our dynamic engine.
In this step, we will have to connect Clay to Webflow and ensure our landing page layout picks up the correct data.
Here’s how to do it:
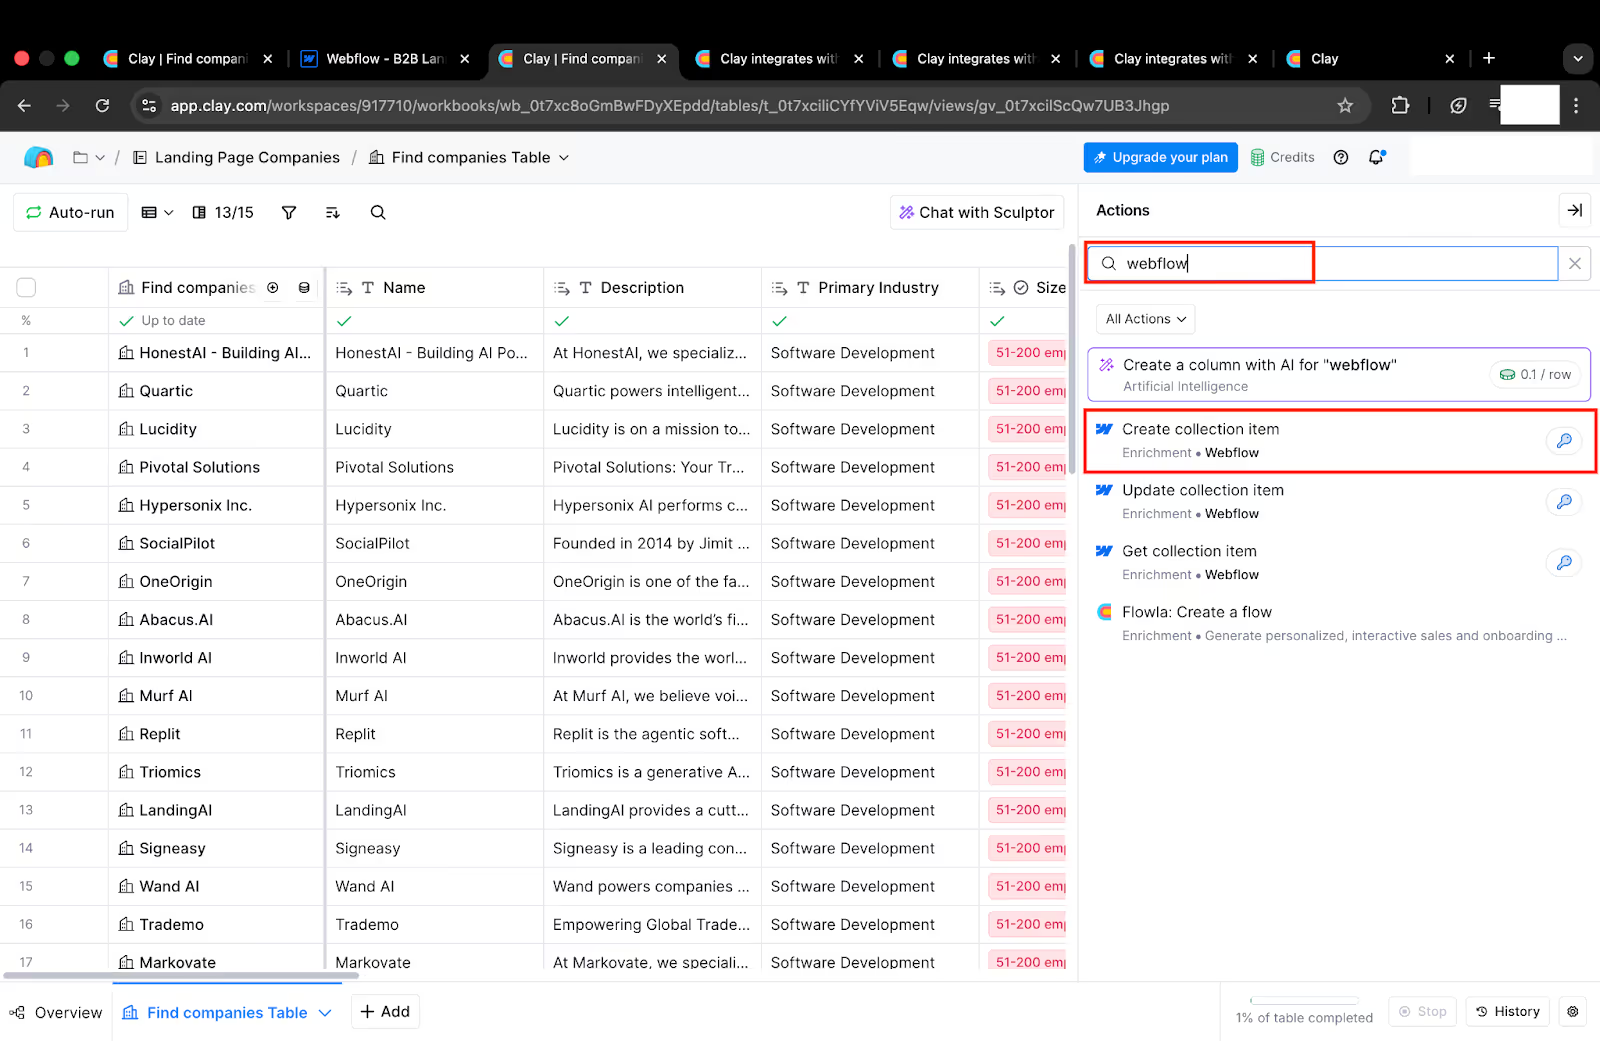
- Click on the Actions button on the table, and search for Webflow.
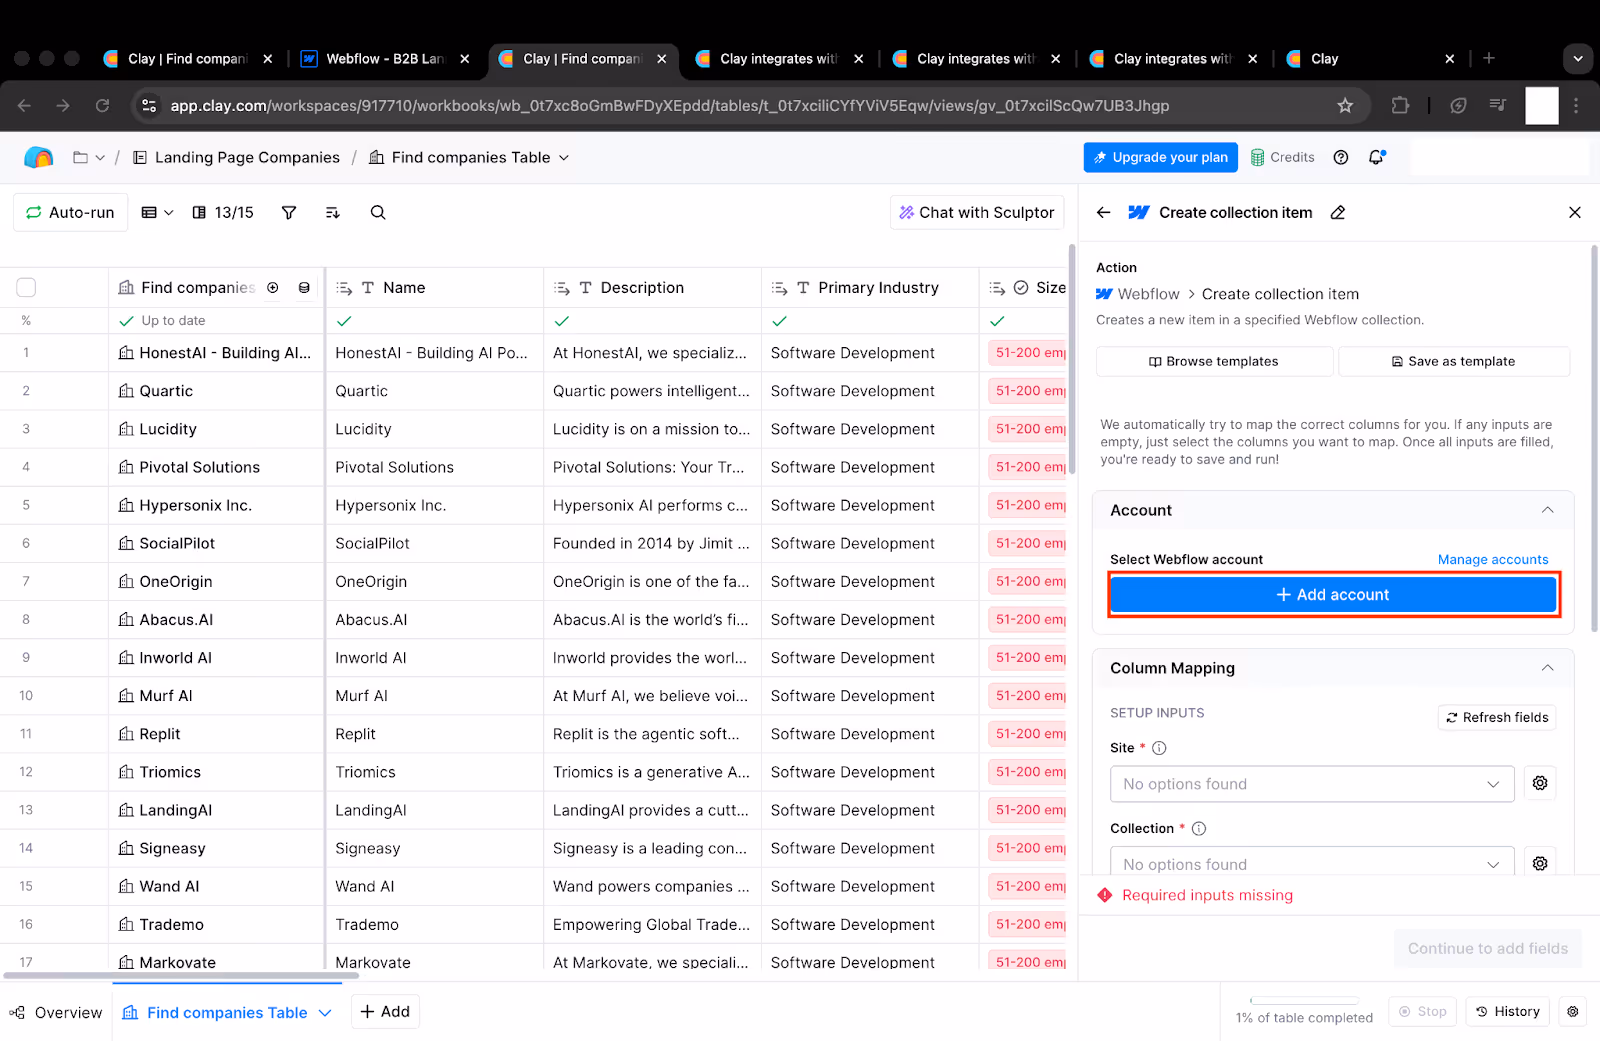
- Now click Create Collection Item.
- After this, click on the Add Account button, and sign in with your Webflow account.
- After this, select the relevant Site (B2B Landing Pages) and Collection (Landing Pages).
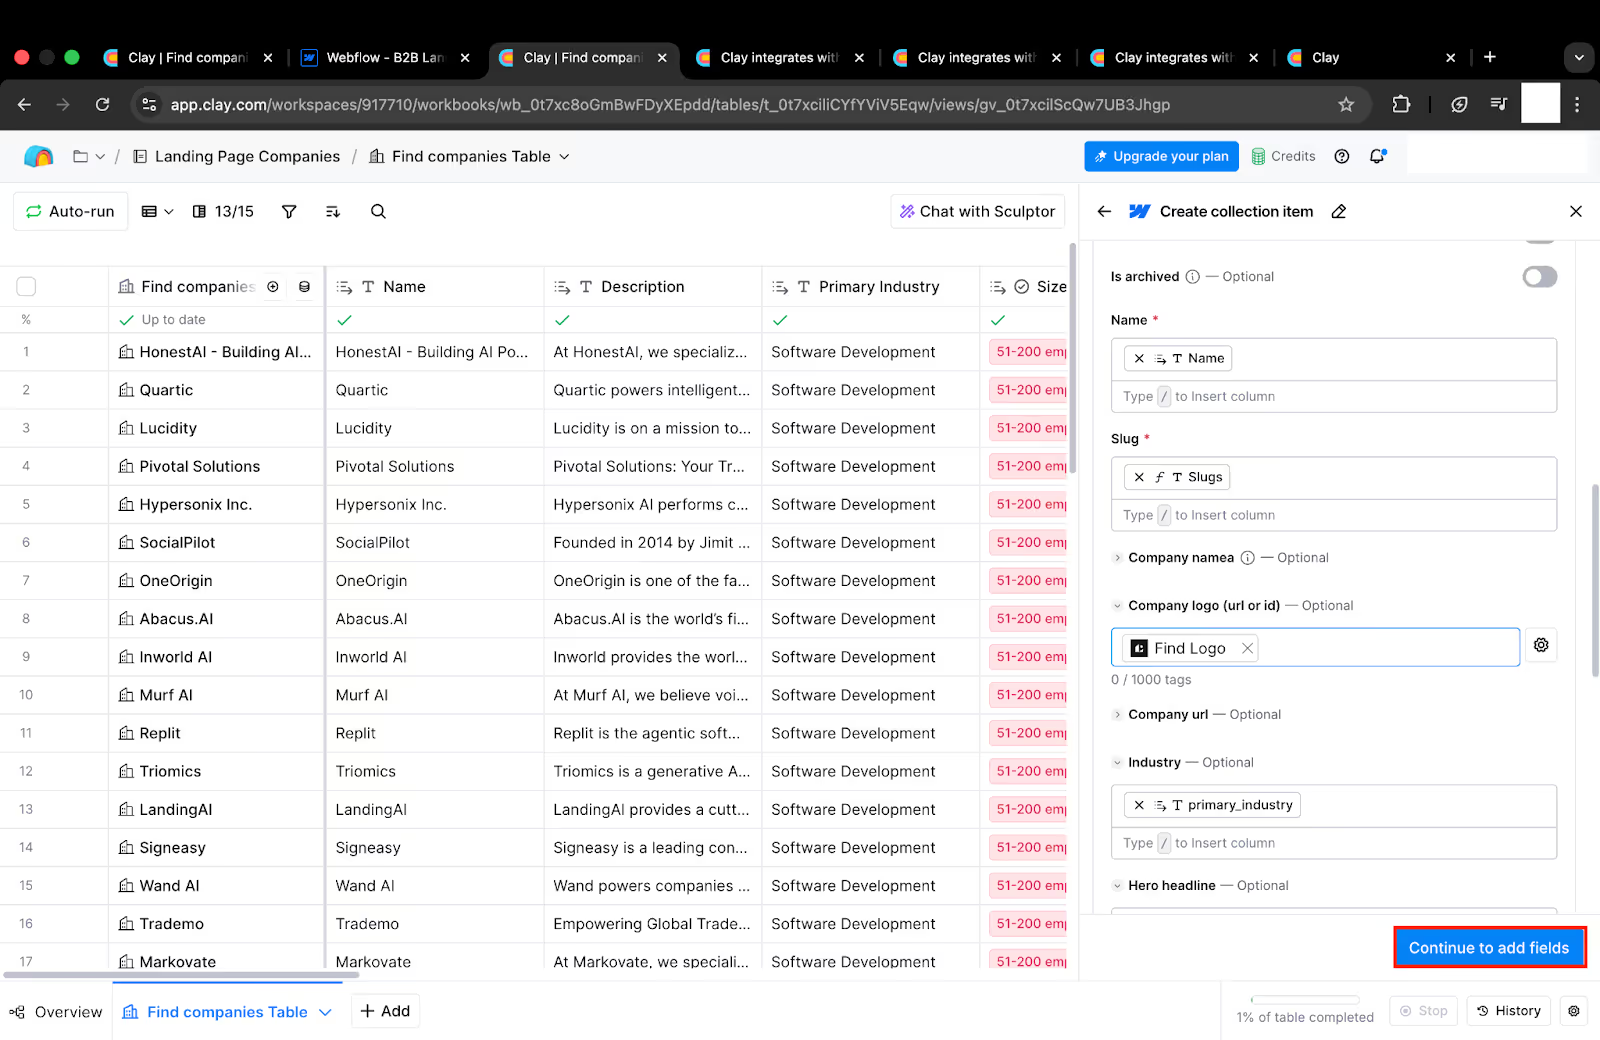
- After this, for the Name, type / and select the column of the company name (in my table, it’s Name).
- Next, for the Slug, type / and select the column of the company name (in my table, it’s Slugs).
- Map each Clay column to the matching Webflow field:
Clay: "Company Name" → Webflow: "Company Name."- Clay: "Logo URL" → Webflow: "Company Logo."
- Clay: "Hero Headline" → Webflow: "Hero Headline."
- Clay: "Subheadline" → Webflow: "Subheadline."
- Clay: "Value Proposition" → Webflow: "Value Proposition."
- Clay: "Primary CRM" → Webflow: "Primary CRM."
- Clay: "Slug" → Webflow: "Slug", etc.
- Now click Continue to Add Fields.
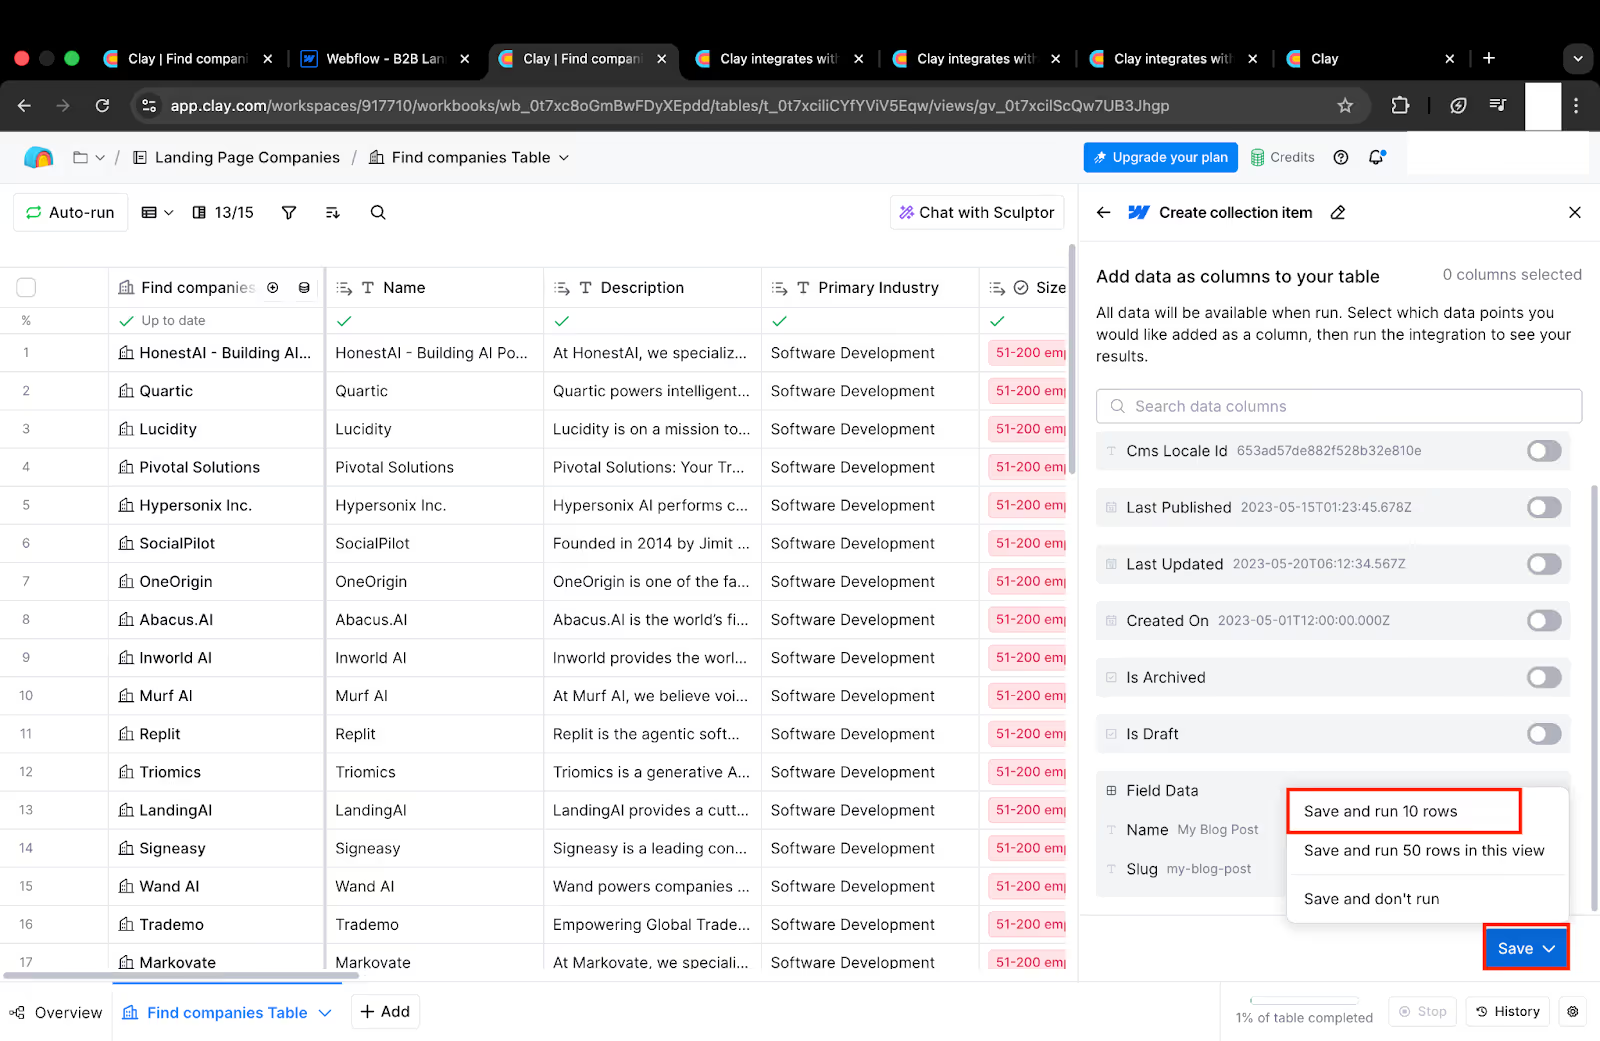
- Now click Save> Save and run for 10 rows.
- You will see a screen like this now. It should say Created Item for every row.
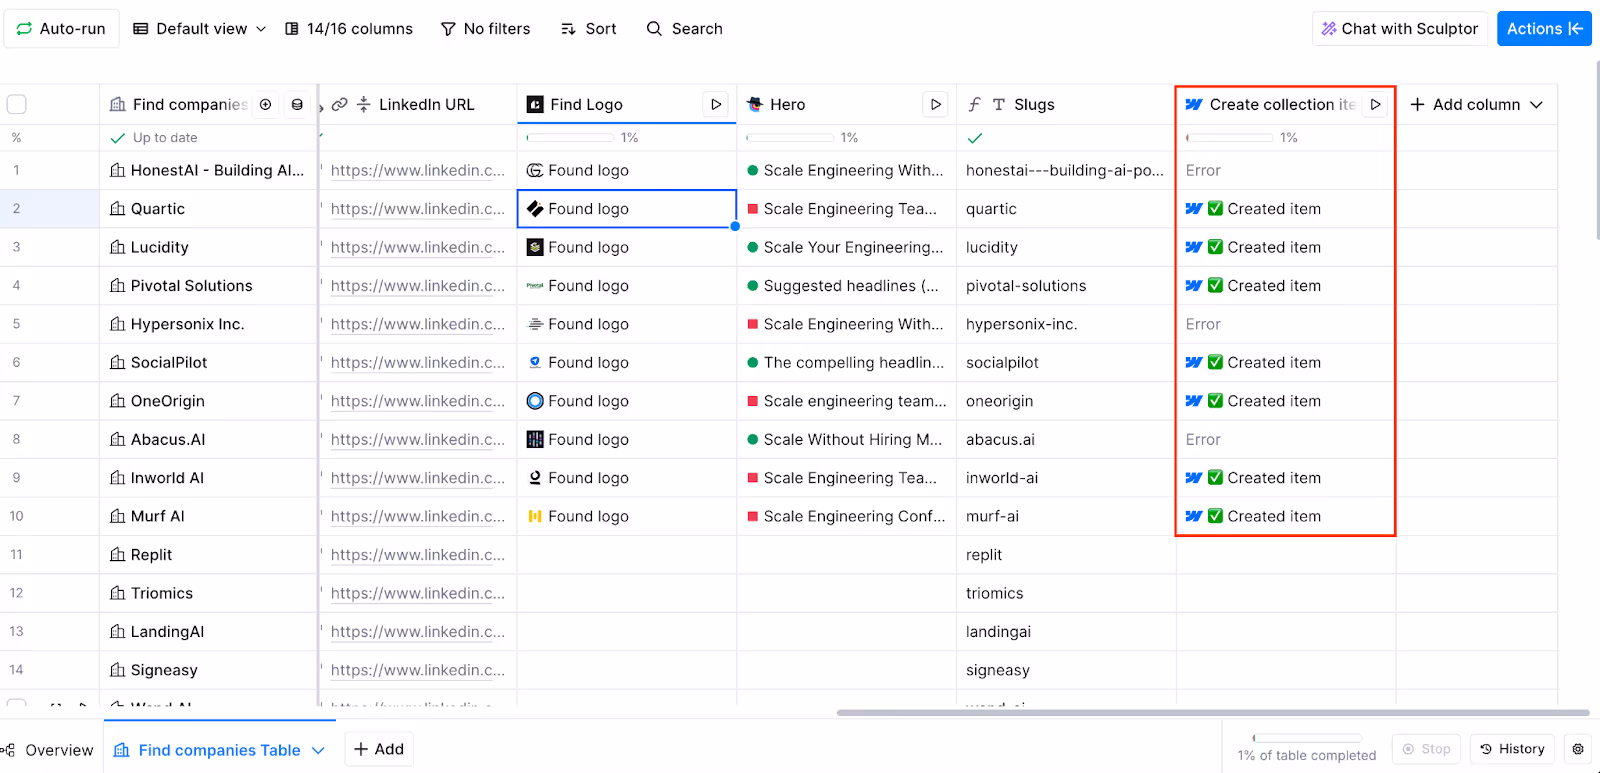
- Go back to your Webflow project, and you will see all the data in the CMS now.
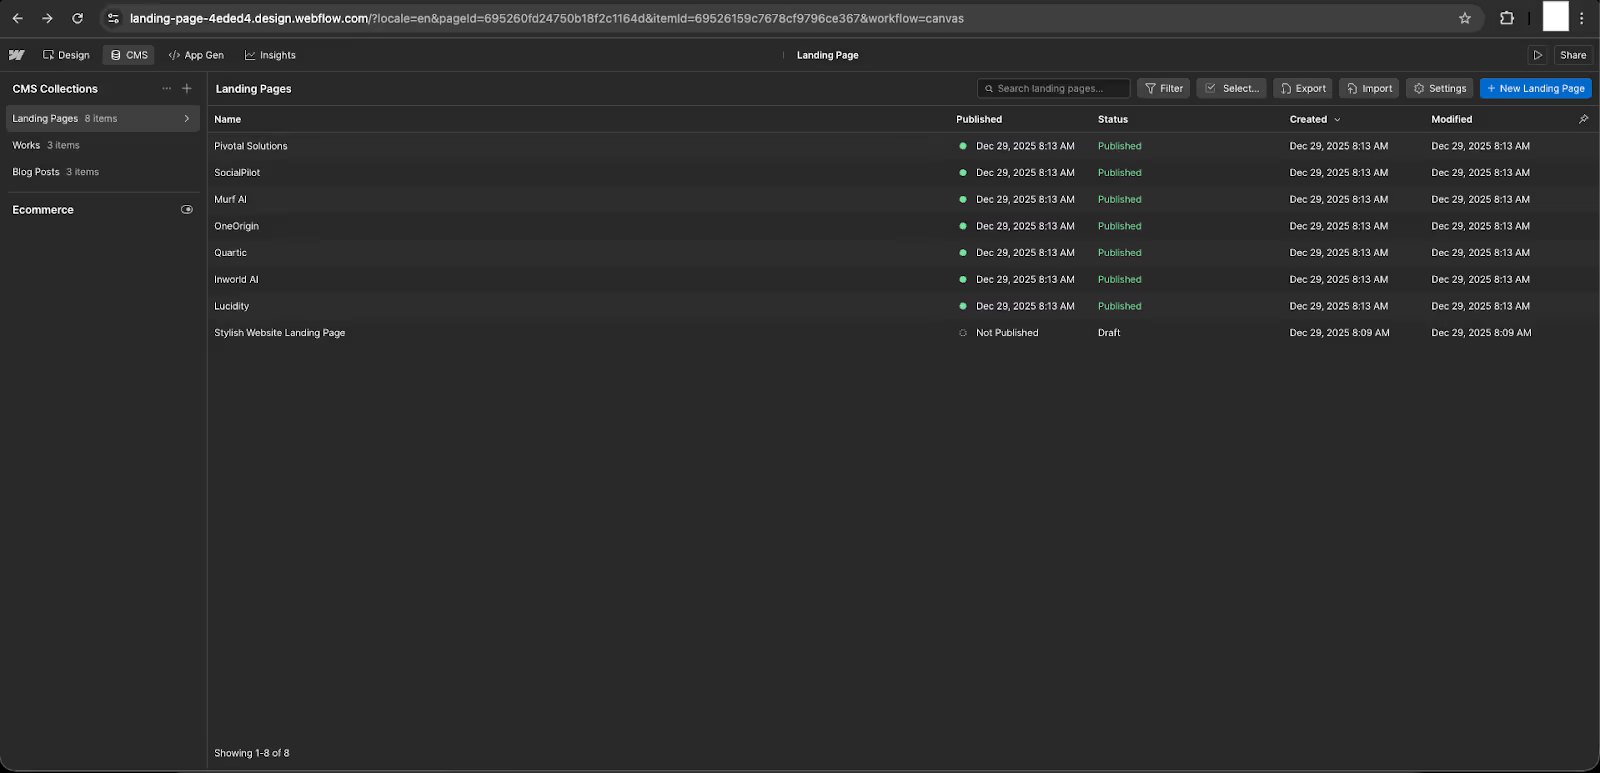
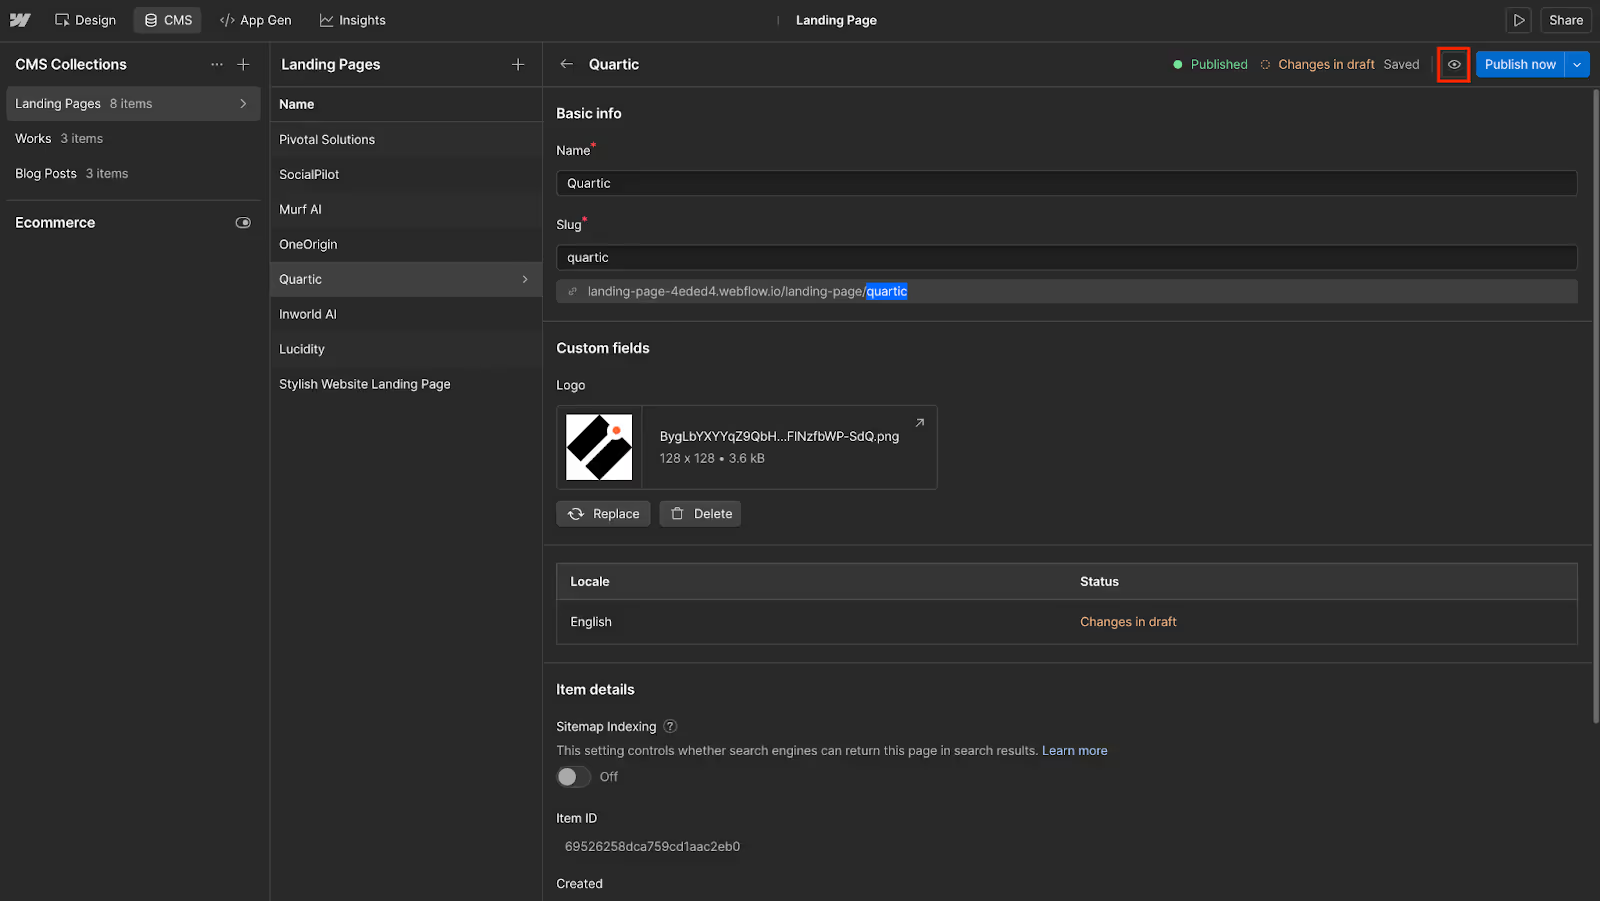
- Click on the one you want to view (for instance, Quartic).
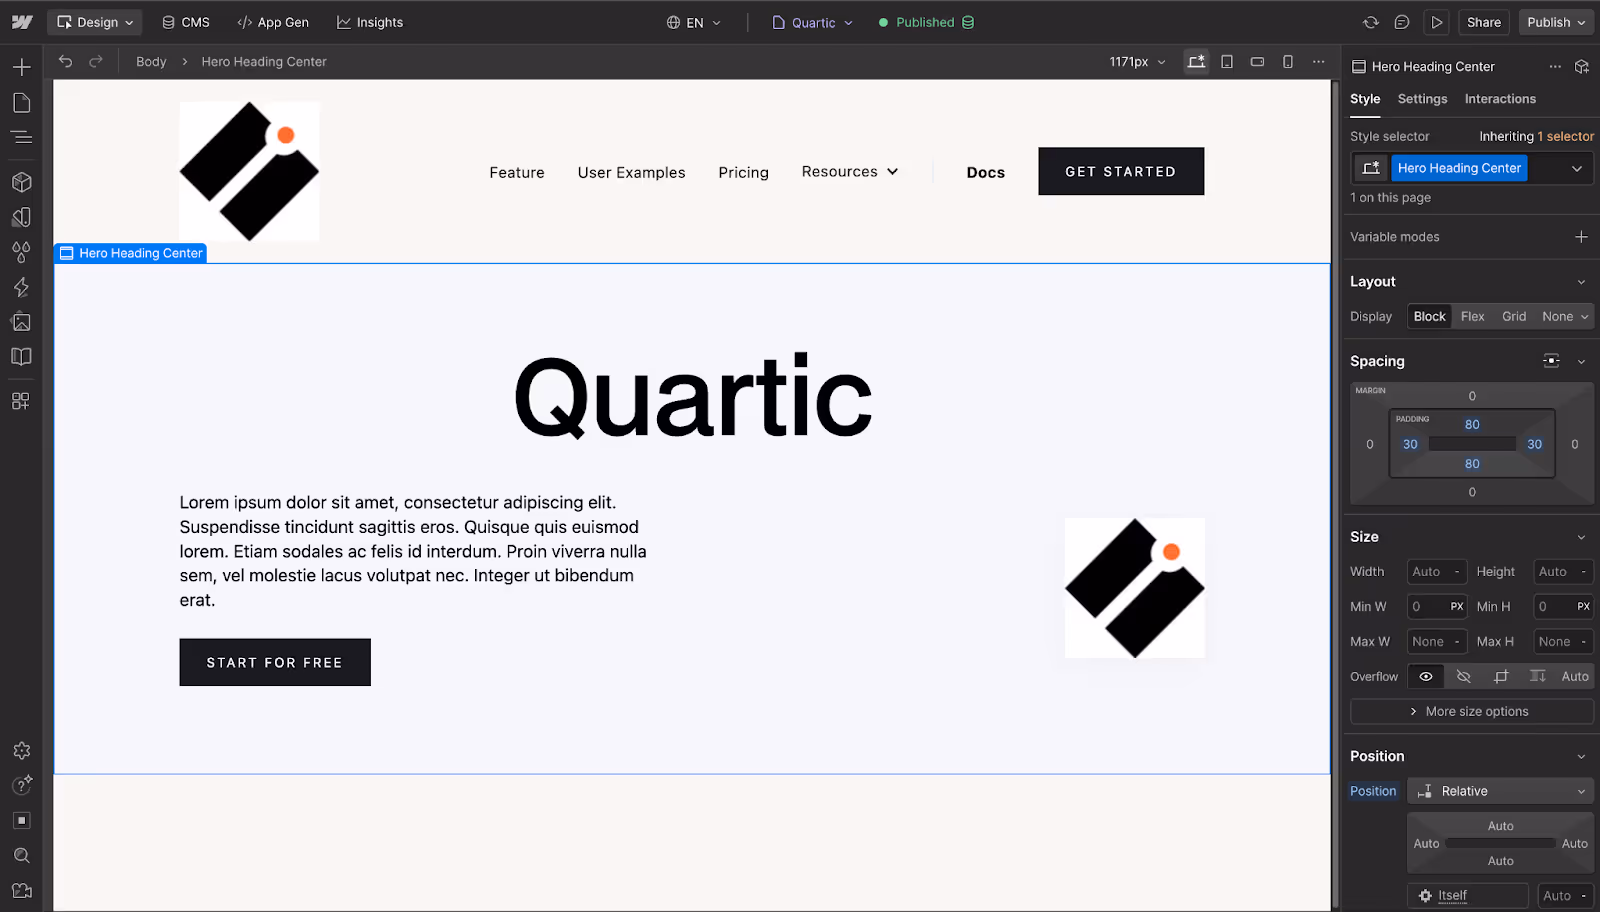
- Now, click on this Eye icon to preview the site.
- Currently, I have the logo and the name bound to the element, so I see the template like this.
Step 5: Updates and Iterations
Once you have your prospects with landing pages ready, you can add more data to Clay.
You can import as many companies as you want, and Webflow will create landing pages for them.
For the designing part, you will have to manually design the template of the landing page that you will be using ahead.
You can use custom fields and data of your choice.
Here’s a final checklist to consider before you start sending out your landing pages:
- Webflow upgraded to CMS Site plan
- Collection created with all fields
- Test Collection item with sample data created
- Template page designed and published
- All key elements bound (headline, logo, copy, CTA)
- Clay account created
- Table created with prospect companies
- Data enriched (logos, tech stacks, etc.)
- Personalized copy generated (AI)
- Clay is connected to Webflow
- Field mappings are set up correctly
- Test run successful (1 company)
- Full batch run executed (all companies)
- Pages verified in Webflow CMS
- Live pages previewed and look good
- Landing page URLs generated and ready
- Campaigns launched!
Get your landing page invite.
It will be something like: domain.com/landing-pages/quadric
This may vary for each company, so copy the relevant one.
Conclusion
Clay and Webflow integration can save a lot of time that you would have spent building each landing page separately.
This may be a challenging concept to grasp at first and requires data cleaning, prompt engineering, and CMS management.
However, the ROI on time invested is infinite.
With this dynamic engine, you can build thousands of prospects within minutes. Even updating the prospects takes only a fraction of a minute.
You can follow the above guide to know how to get it started. We aren’t talking about a high-level theory, but the architecture and step-by-step guide to get you started.
So what are you waiting for? Try this integration now and create thousands of personalized, dynamic landing pages quickly.
Need This Built for You?
If you want to implement this dynamic landing page system without spending weeks on setup, data cleaning, and CMS wiring, Webyansh can help.
Webyansh specializes in:
- Clay + Webflow integrations
- Dynamic CMS-driven landing pages
- Personalization systems for outbound and ABM campaigns
- Scalable Webflow architectures built for growth teams
Whether you want a proof-of-concept or a fully production-ready system, Webyansh can design, build, and deploy the integration end-to-end. Contact Webyansh to build your dynamic landing page engine.
Do I Need Coding Skills To Build A Dynamic Landing Page Engine?
No, you don’t need coding skills to integrate Clay and Webflow to create landing page engines. Both of these are no-code platforms; you can set them up using the visual interface and prompts.
What Specific Elements Can Be Personalized Using Clay And Webflow?
With their integration, you can create dynamic web pages with dynamic elements, including text, images, social proof, CTAs, etc. These elements will change automatically with the prospects.
Are There Limits To How Many Dynamic Pages I Can Create On Webflow?
With the free account of Webflow, you can create 2 web pages, 50 CMS Items, and 20 CMS collections. Talking about Clay, you get 1200 credits per year, which you can use for AI actions on Clay.
How Do I Ensure AI-Generated Content in Clay is Accurate?
To ensure data accuracy, make sure you run the AI actions in a small batch. Use this option ‘Save and Run for 10 Rows’ to make sure data generated by AI is accurate.
How Does Clay Integrate With Webflow To Build These Pages?
As we talked earlier, Clay is the brain of the engine, and Webflow is the body. When you integrate Clay to Webflow, Clay will send the enriched data to Webflow’s element, and Webflow will generate a unique page with a unique URL, which you can send to your prospect.